Public S3 CloudFront Origin
Detects the use of an S3 bucket as a CloudFront origin without an origin access identity
When S3 is used as an origin for a CloudFront bucket, the contents should be kept private and an origin access identity should allow CloudFront access. This prevents someone from bypassing the caching benefits that CloudFront provides, repeatedly loading objects directly from S3, and amassing a large access bill.
Recommended Actions
Follow the appropriate remediation steps below to resolve the issue.
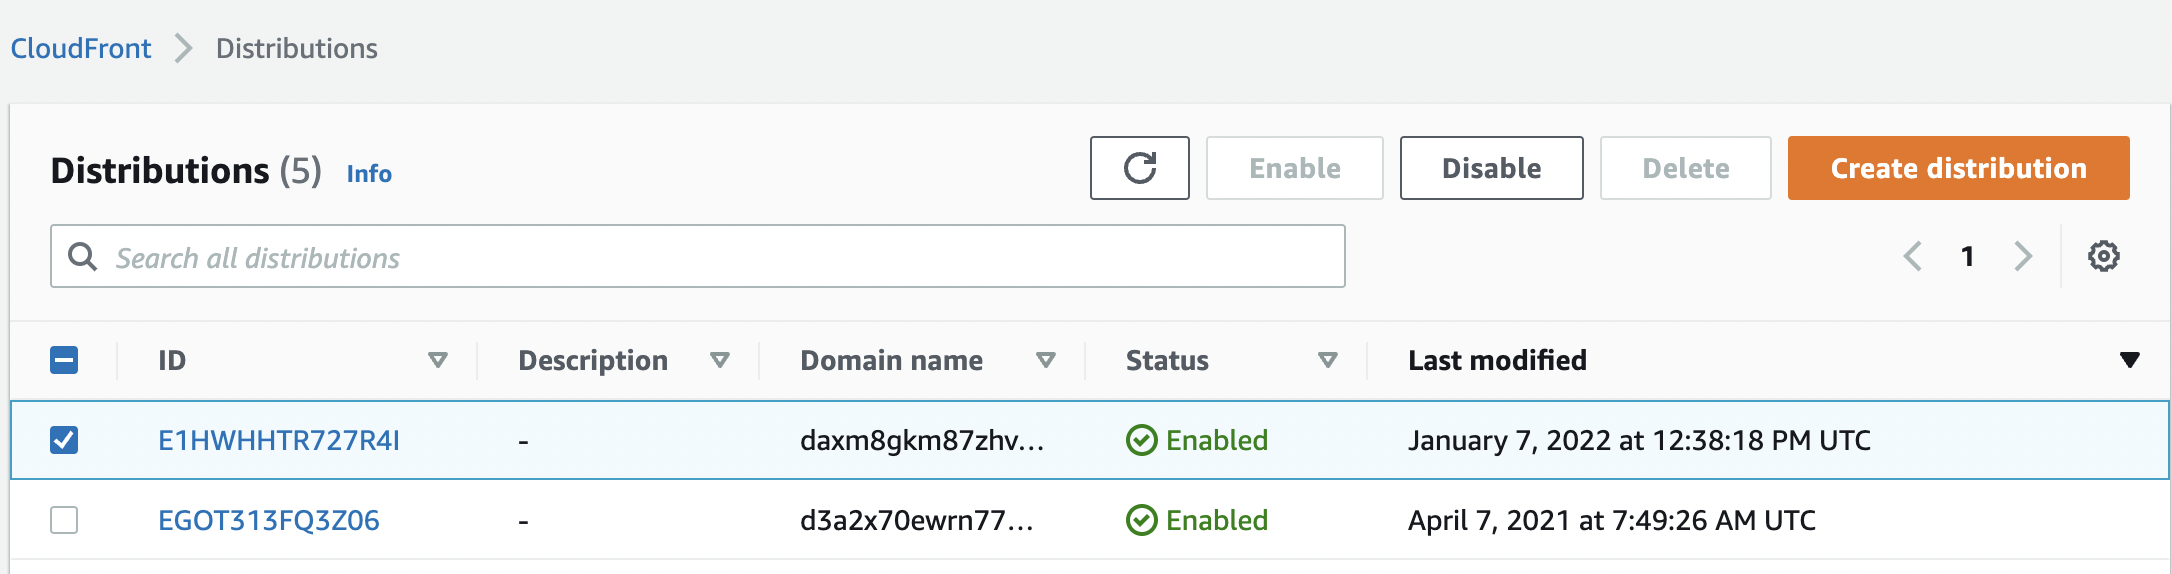
Log into the AWS Management Console.
Select the “Services” option and search for CloudFront.

Select the “CloudFront Distribution” that needs to be verified.
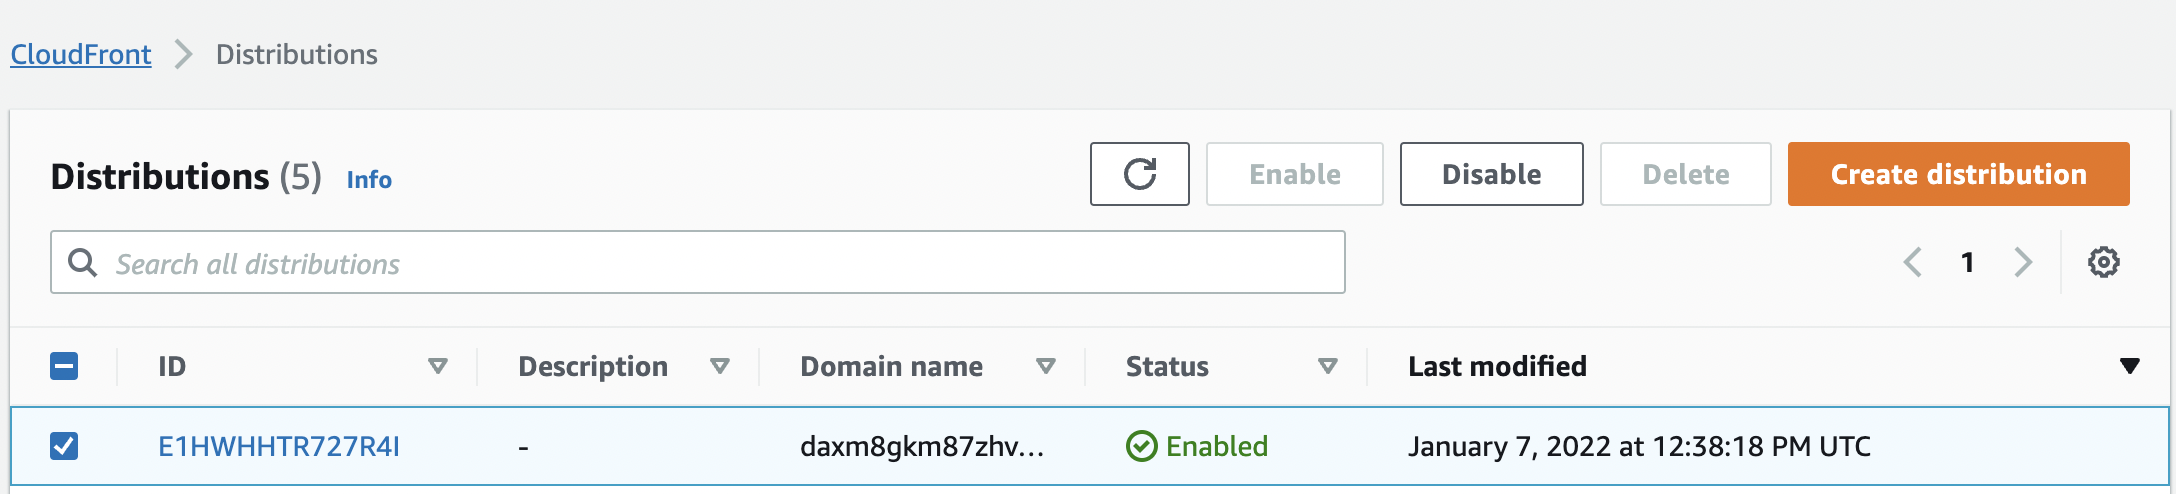
Click the “Distribution Id” to get into the “Distributions” configuration page.
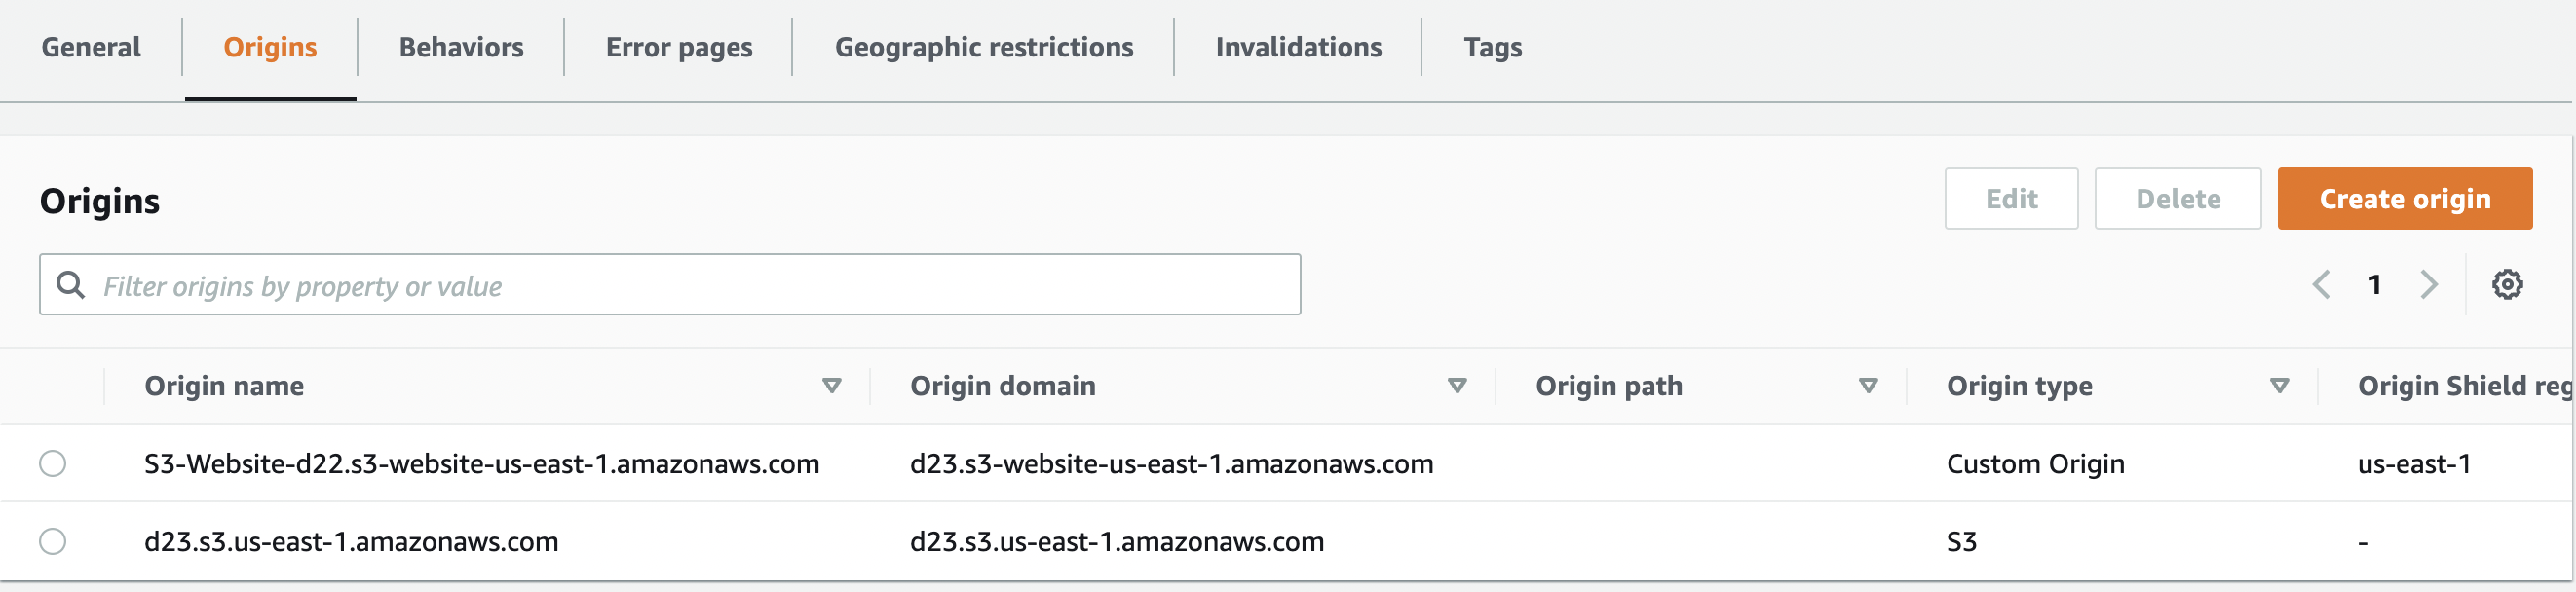
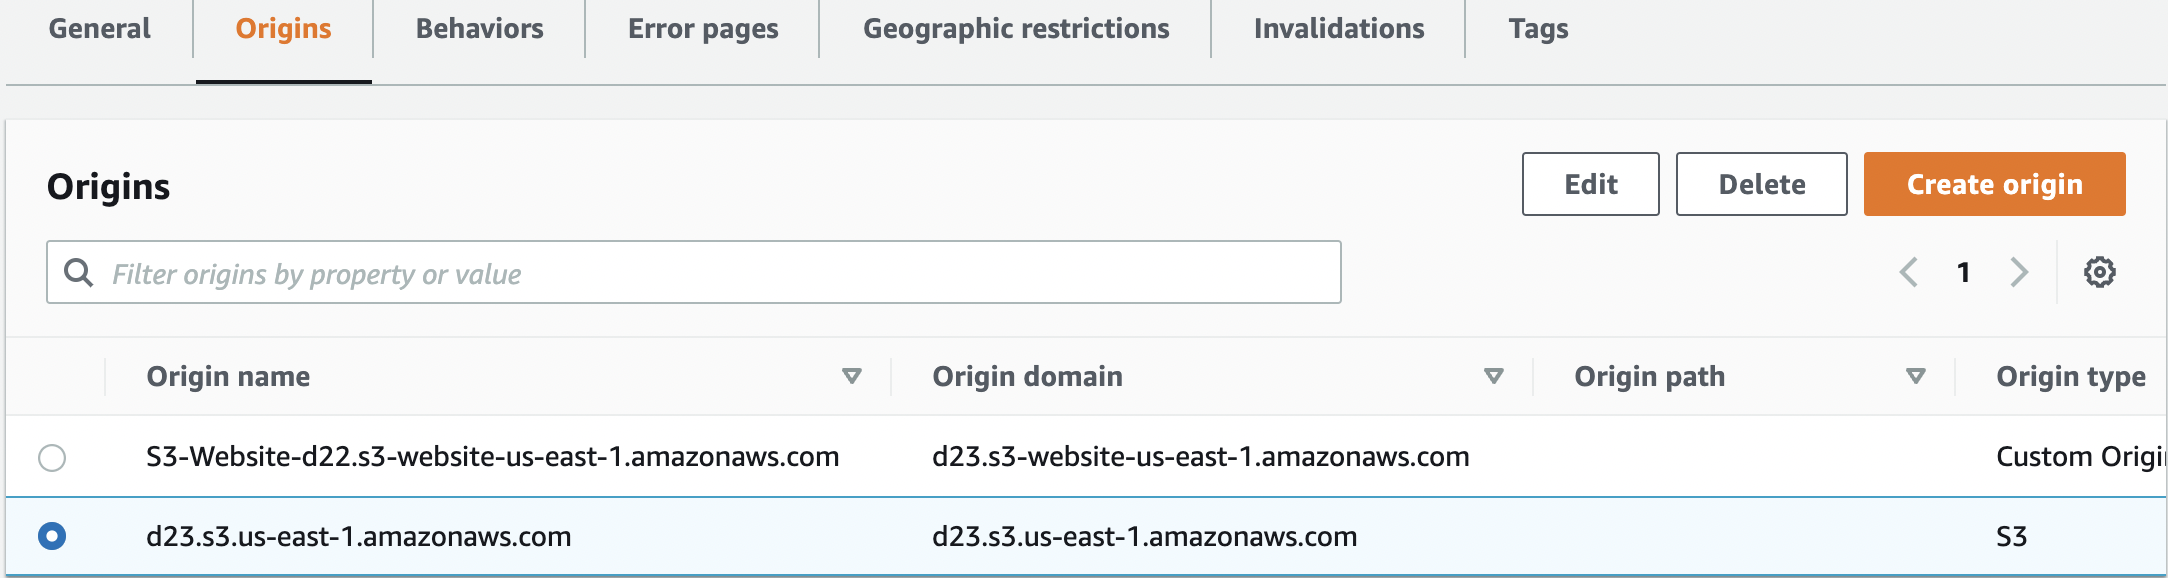
Click on the “Origins” tab and select the “Origin” which needs to be verified. Check the “Origin type” and if it is “custom origin” then you would have to create a new origin for the same S3 Bucket. If the “Origin type” is “S3” then select and edit it.
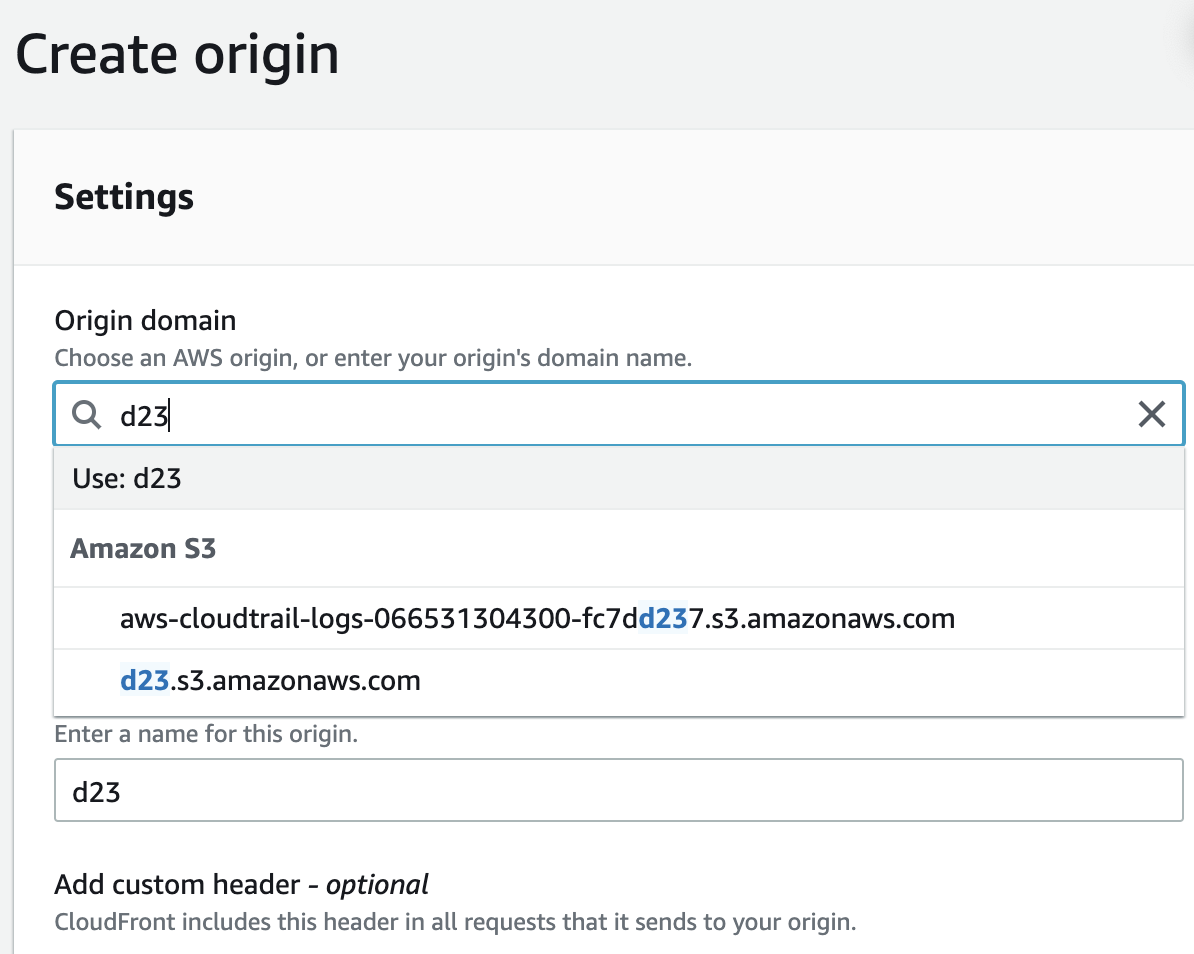
To create origin with “Custom origin” type, Click the “Create origin” button.

On the “Create Origin” Page type the S3 Bucket name in “Origin Domain” setting and select from dropdown.
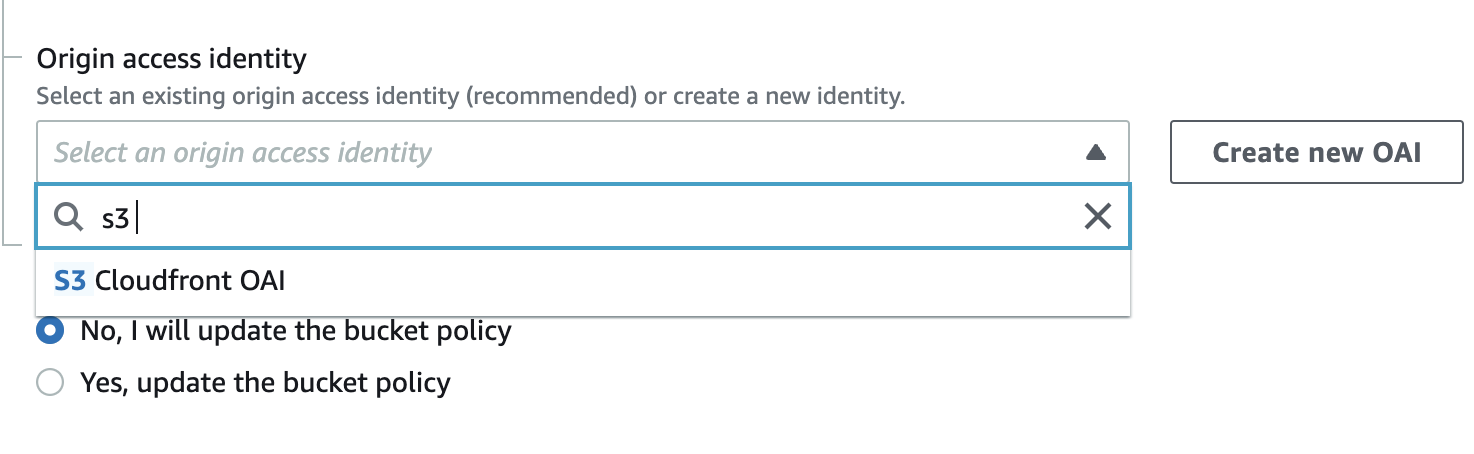
In the “S3 Bucket access” setting select “Yes use OAI (bucket can restrict access to only CloudFront)”.

Under the “Origin Access Identity” choose an existing Origin Access Identity else create a new OAI by clicking on “Create new OAI” button.
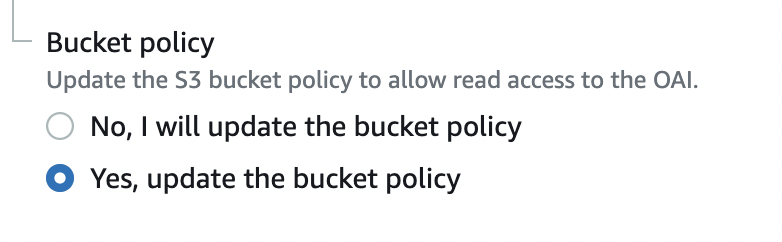
Under the “Bucket policy” if the Bucket policy is set to “No” then the access to the S3 bucket used as the origin is not secured. Click on the “Yes, update the bucket policy” so CloudFront updates bucket permissions to grant the specified origin access identity the permission to read files in your bucket.
Click on “Create origin” button at the end of the page to save the changes. Jump to step 17 once you have finished creating new origin.

If you are editing an existing S3 origin then click “Edit”.
In the S3 Bucket access select “Yes use OAI (bucket can restrict access to only CloudFront)”.
Under the “Origin Access Identity” choose an existing Origin Access Identity else create a new OAI by clicking on “Create new OAI” button.
Under the “Bucket policy” if the Bucket policy is set to “No” then the access to the S3 bucket used as the origin is not secured. Click on the “Yes, update the bucket policy” under “Bucket Policy” so CloudFront updates bucket permissions to grant the specified origin access identity the permission to read files in your bucket.
Click on “Create origin” button at the end of the page to save the changes.
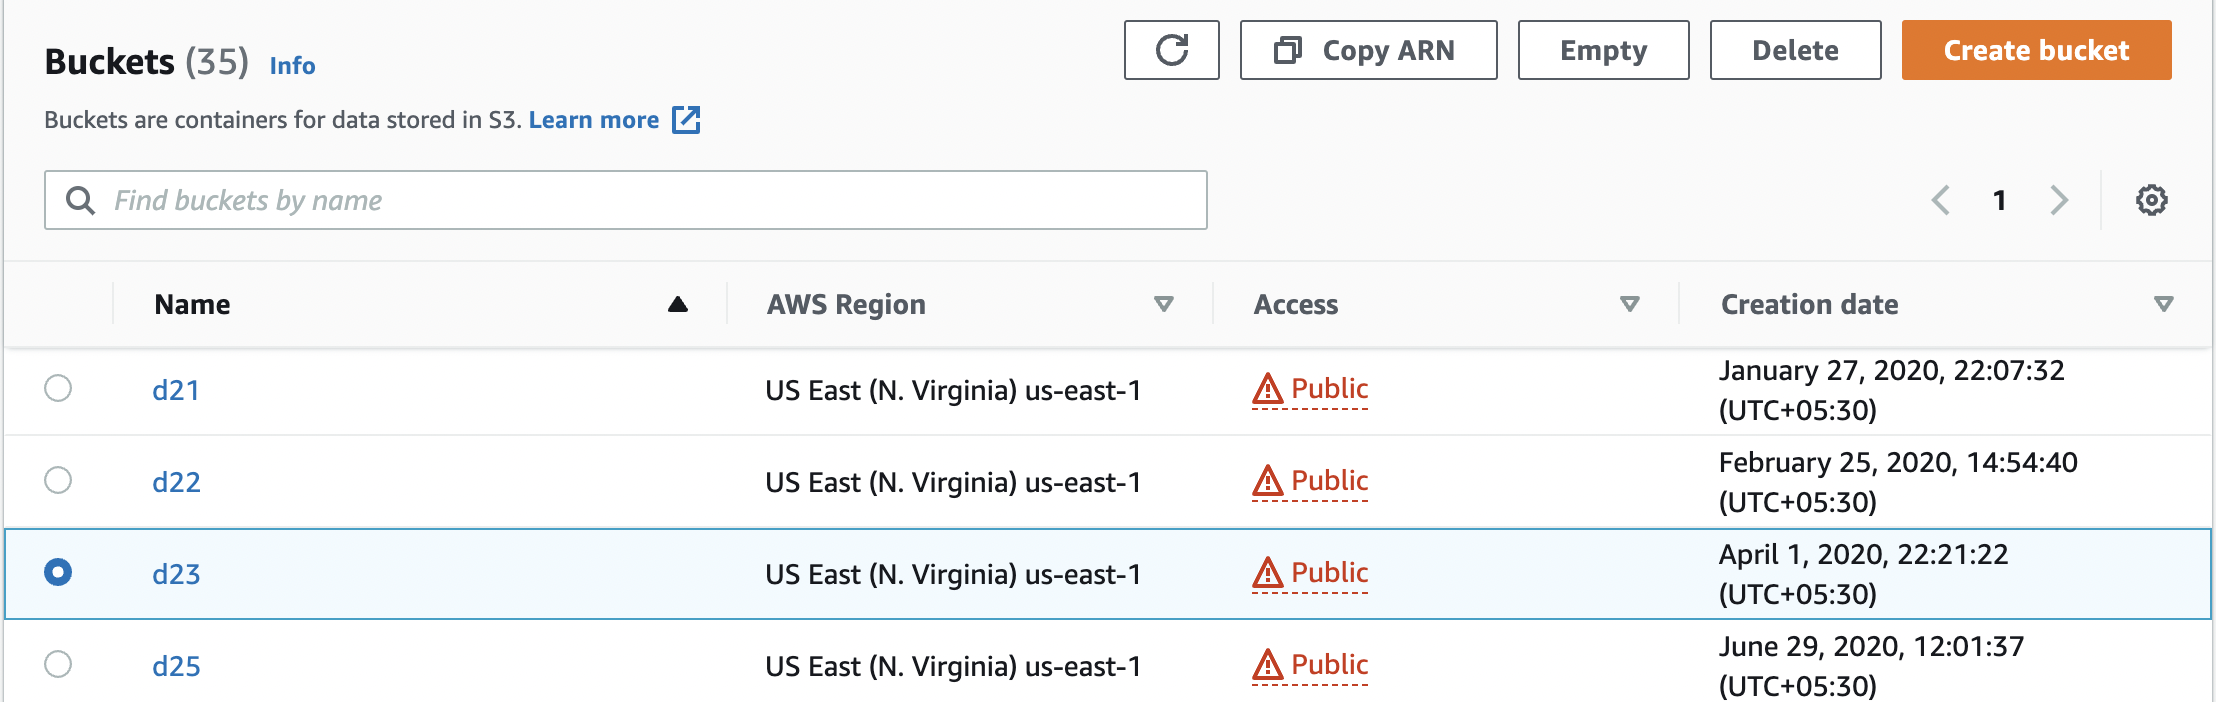
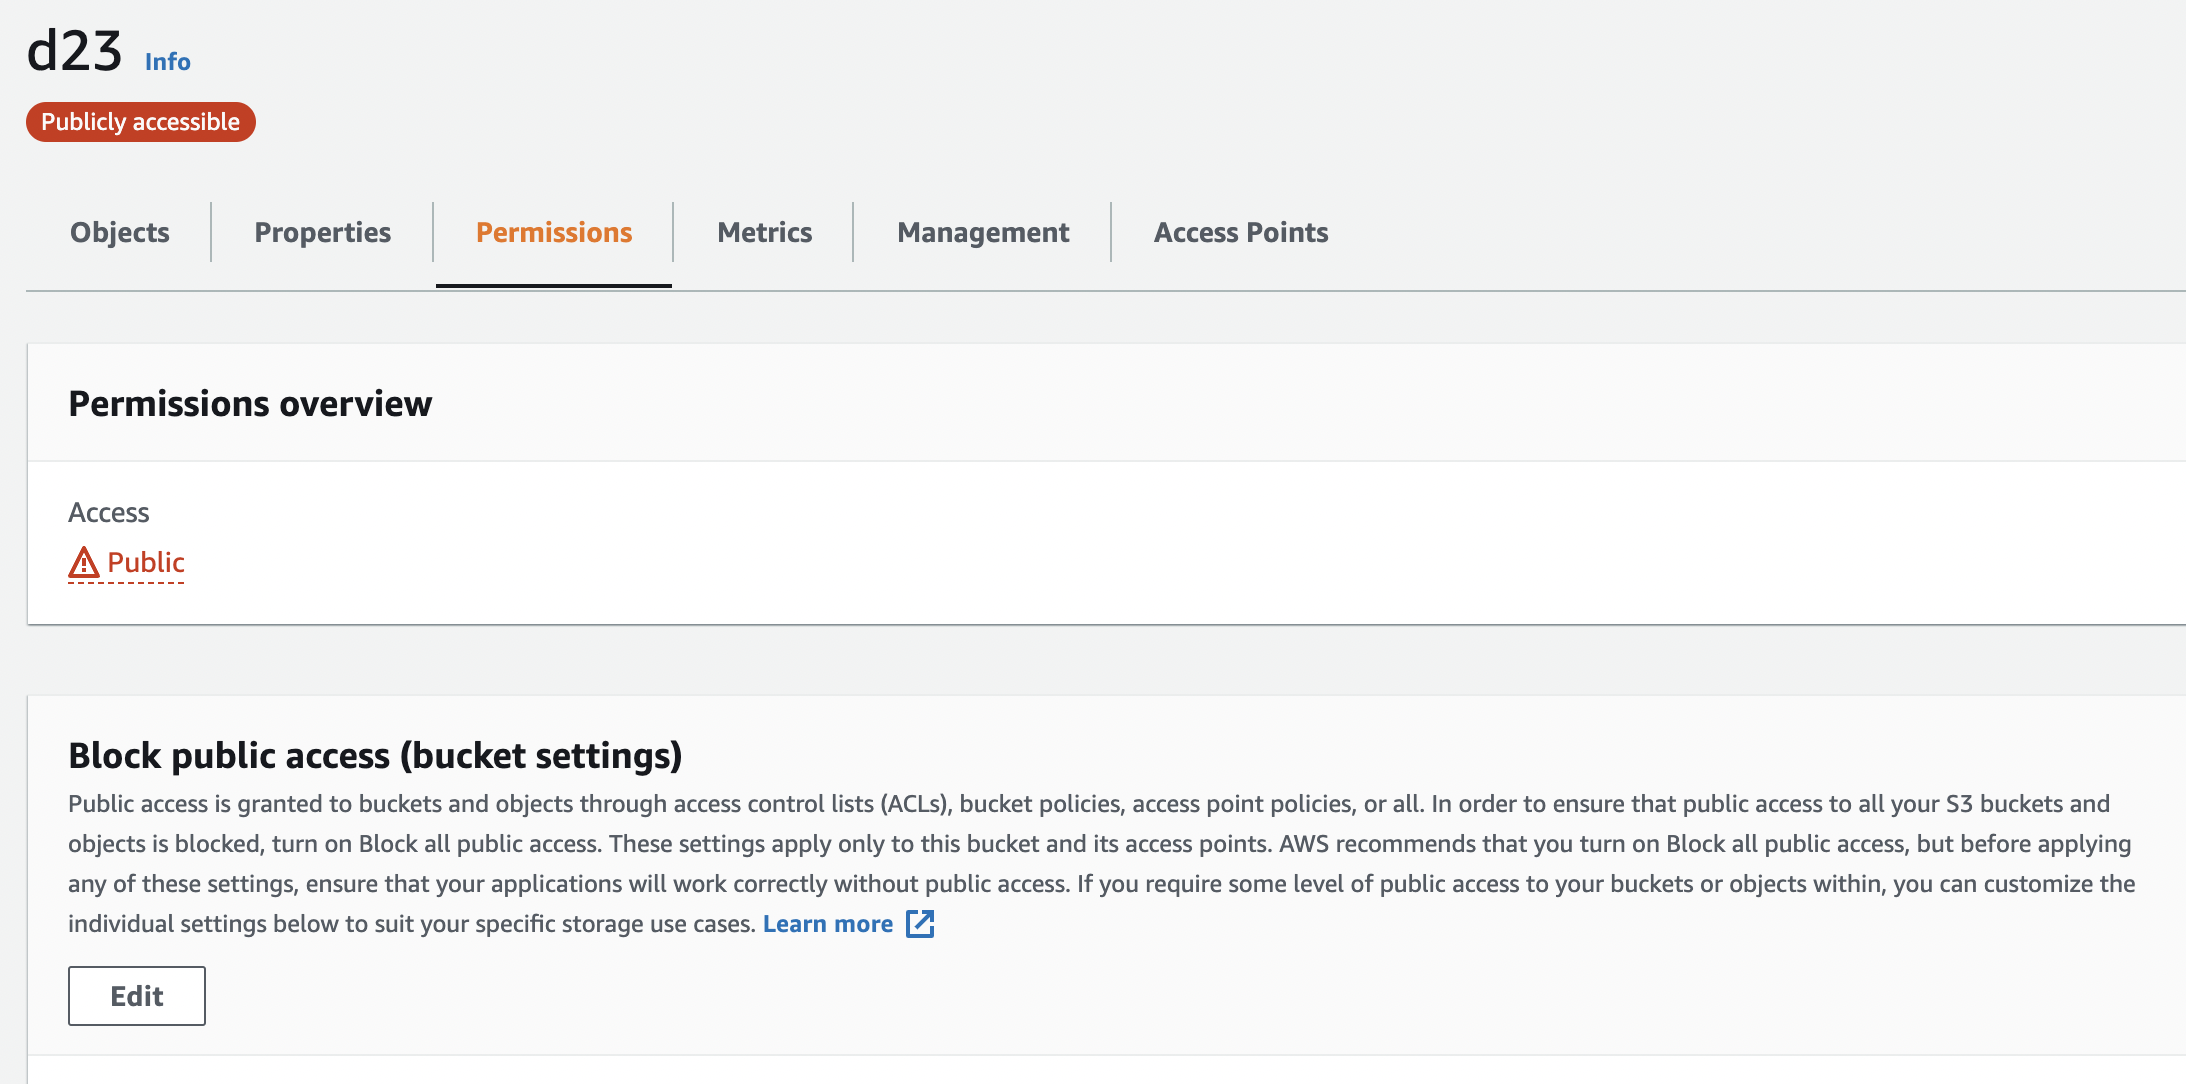
Navigate to “S3 bucket dashboard” and choose and click the S3 bucket used to verify the “Permissions” on S3 bucket.
Click the “Permissions” tab and scroll to the “Block public access (bucket settings)” for the bucket and click on the “Edit” button.
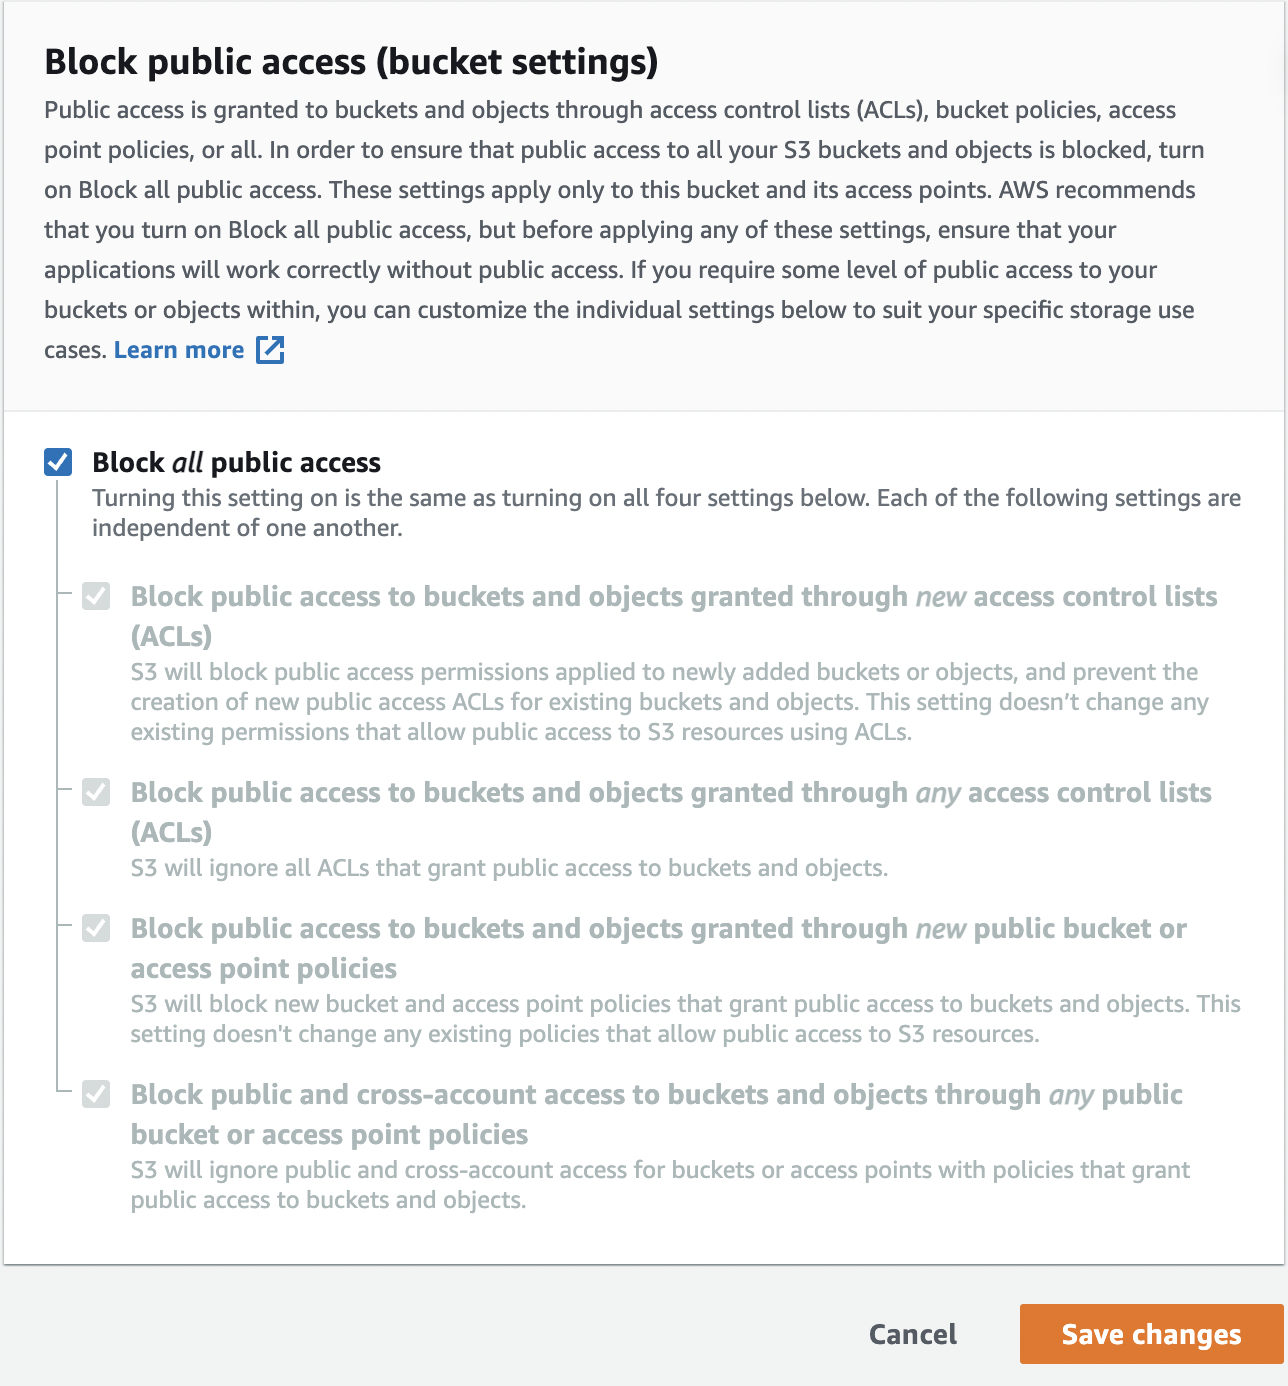
On the “Edit Block public access (bucket settings)” page select “Block all public access” to verify the “Permissions”. Click on “Save changes” to make the contents of the S3 bucket private.
Repeat the steps to verify origin access identity for other CloudFront distributions.