Default VPC In Use
Determines whether the default VPC is being used for launching EC2 instances.
The default VPC should not be used in order to avoid launching multiple services in the same network which may not require connectivity. Each application, or network tier, should use its own VPC.
Recommended Actions
Follow the appropriate remediation steps below to resolve the issue.
Log in to the AWS Management Console.
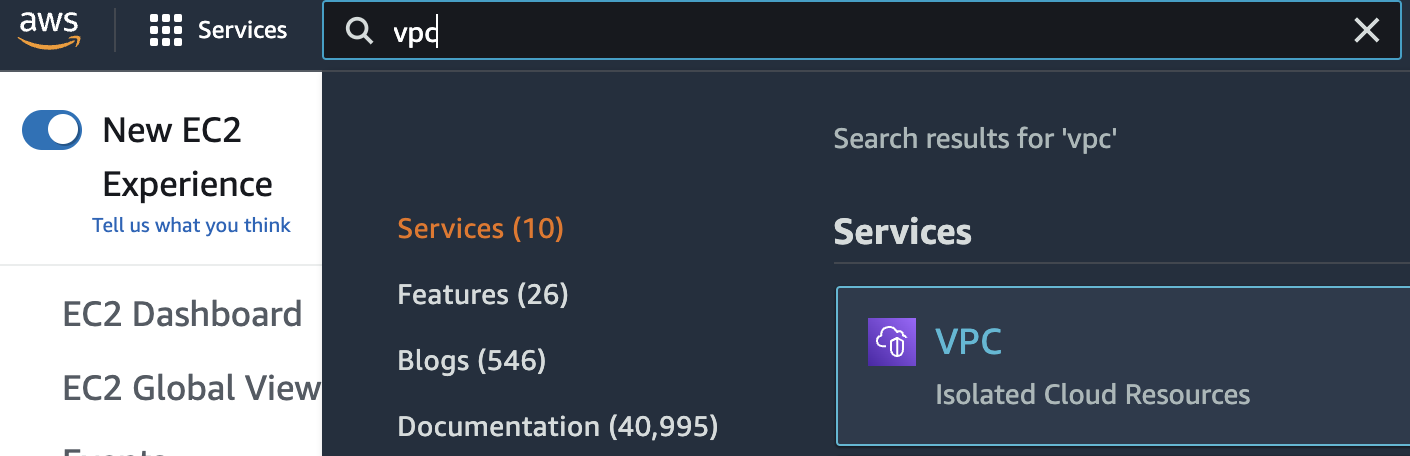
Select the “Services” option and search for VPC.
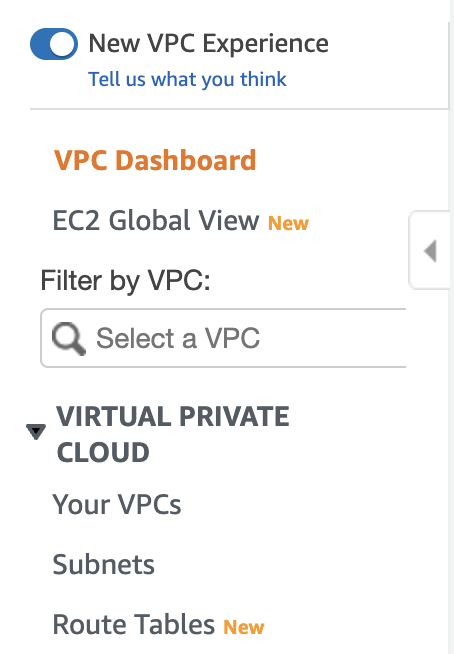
Scroll down the left navigation panel and choose “Your VPC” under “VPC Dashboard”.
Copy the default “VPC ID” from the “VPC” dashboard.
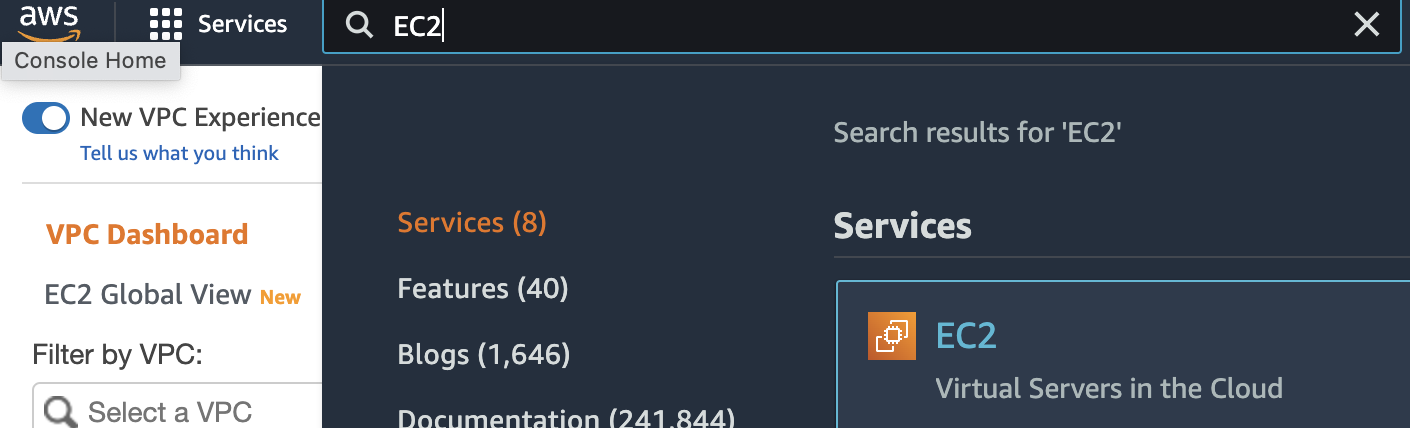
Select the “Services” option and search for EC2.
Scroll down the left navigation panel and choose “Instances”.
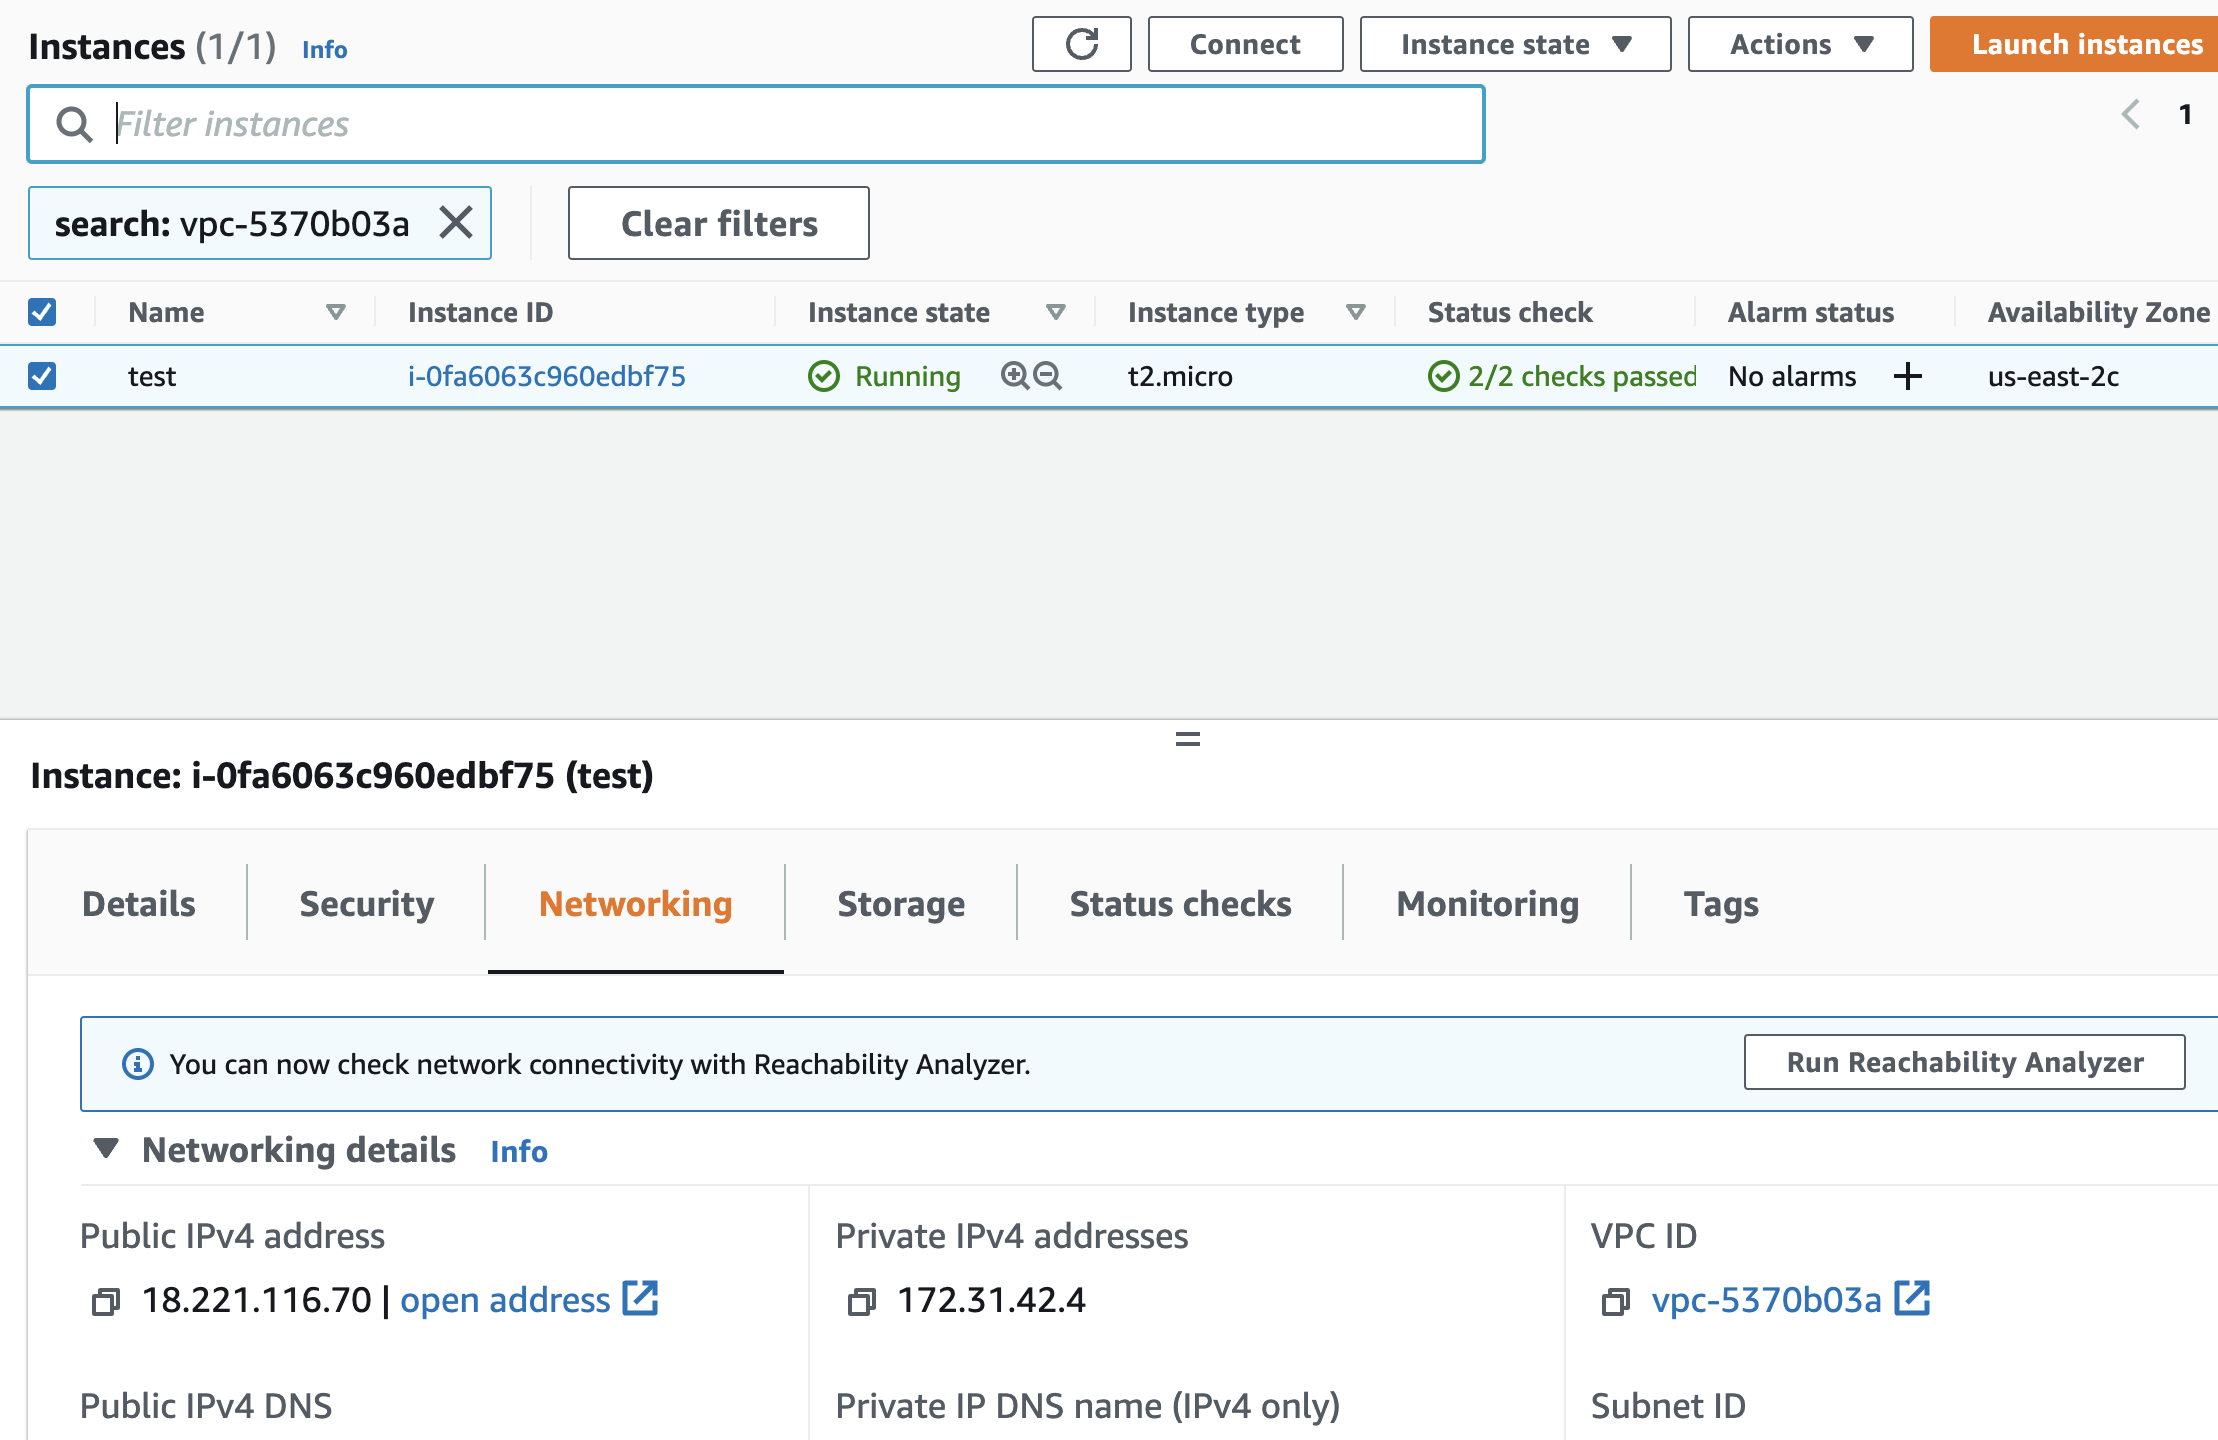
Click inside the " Filter by tags and attributes or search by keyword box" and paste the “VPC ID” we copied in Step4 and press “Enter”. AWS console will return one or more EC2 instances using “default VPC”.
Repeat steps number 2 - 6 to check other AWS regions.
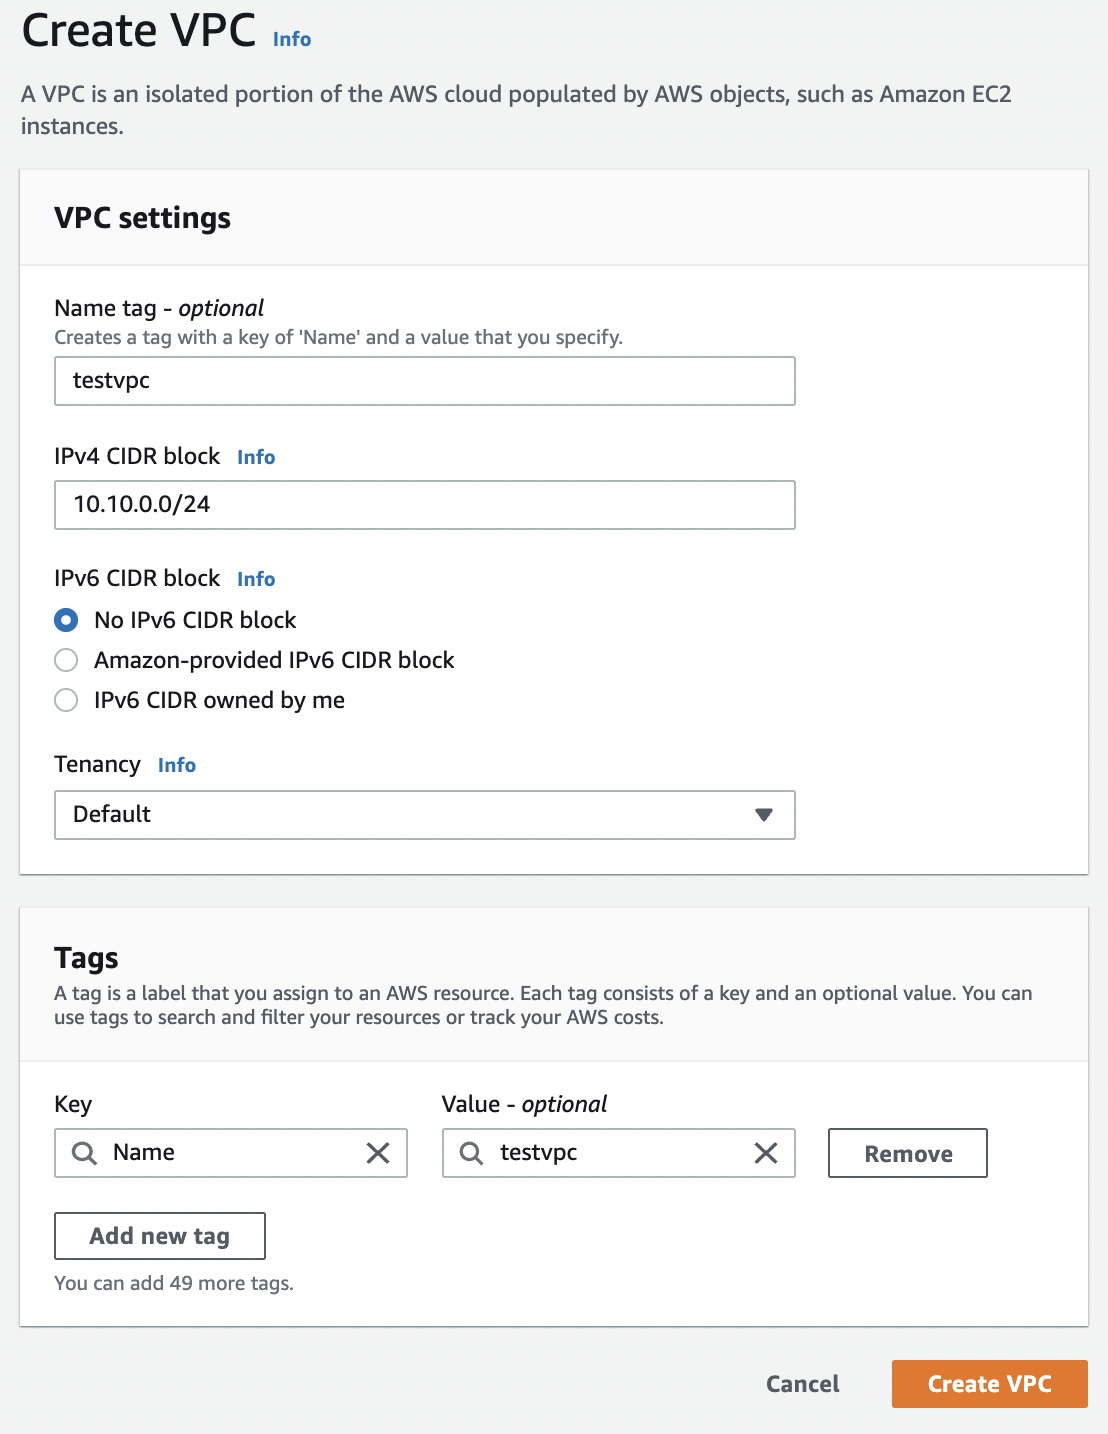
Navigate to “VPC Dashboard” and choose “Your VPC” and click on the “Create VPC” button at the top panel.

Inside “Create VPC” dialog box provide a name to the new VPC and within IPv4 CIDR block box, specify an IPv4 address range for the new VPC. Select the “IPv6 CIDR block” and “Tenancy” option as per the application requirement and click on the “Create VPC” button at the bottom to create a new VPC.
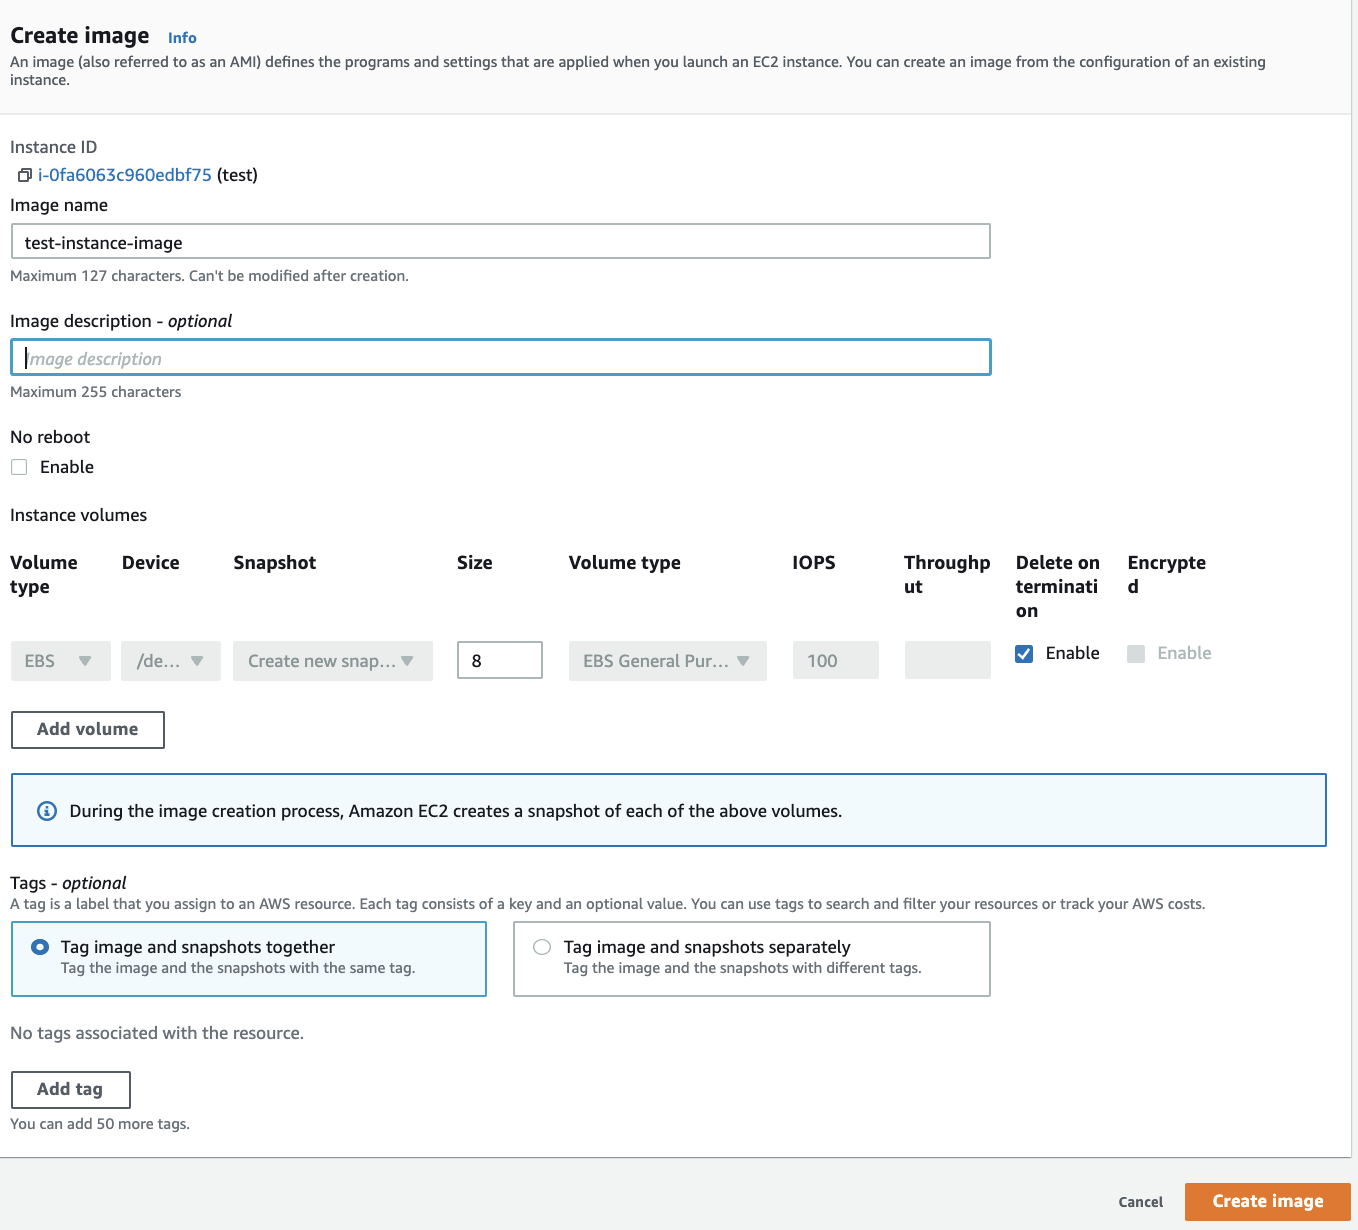
Navigate to the “EC2 dashboard” and select the “EC2 Instance” which is on default VPC. Click on the “Actions” button at the top and choose “Image and templates” and choose “Create image” to create an “Amazon Machine Image” of the selected Instance.

Under the “Create Image” panel provide the “Image Name” and “Image Description” and click on the “Create Image” button at the bottom.
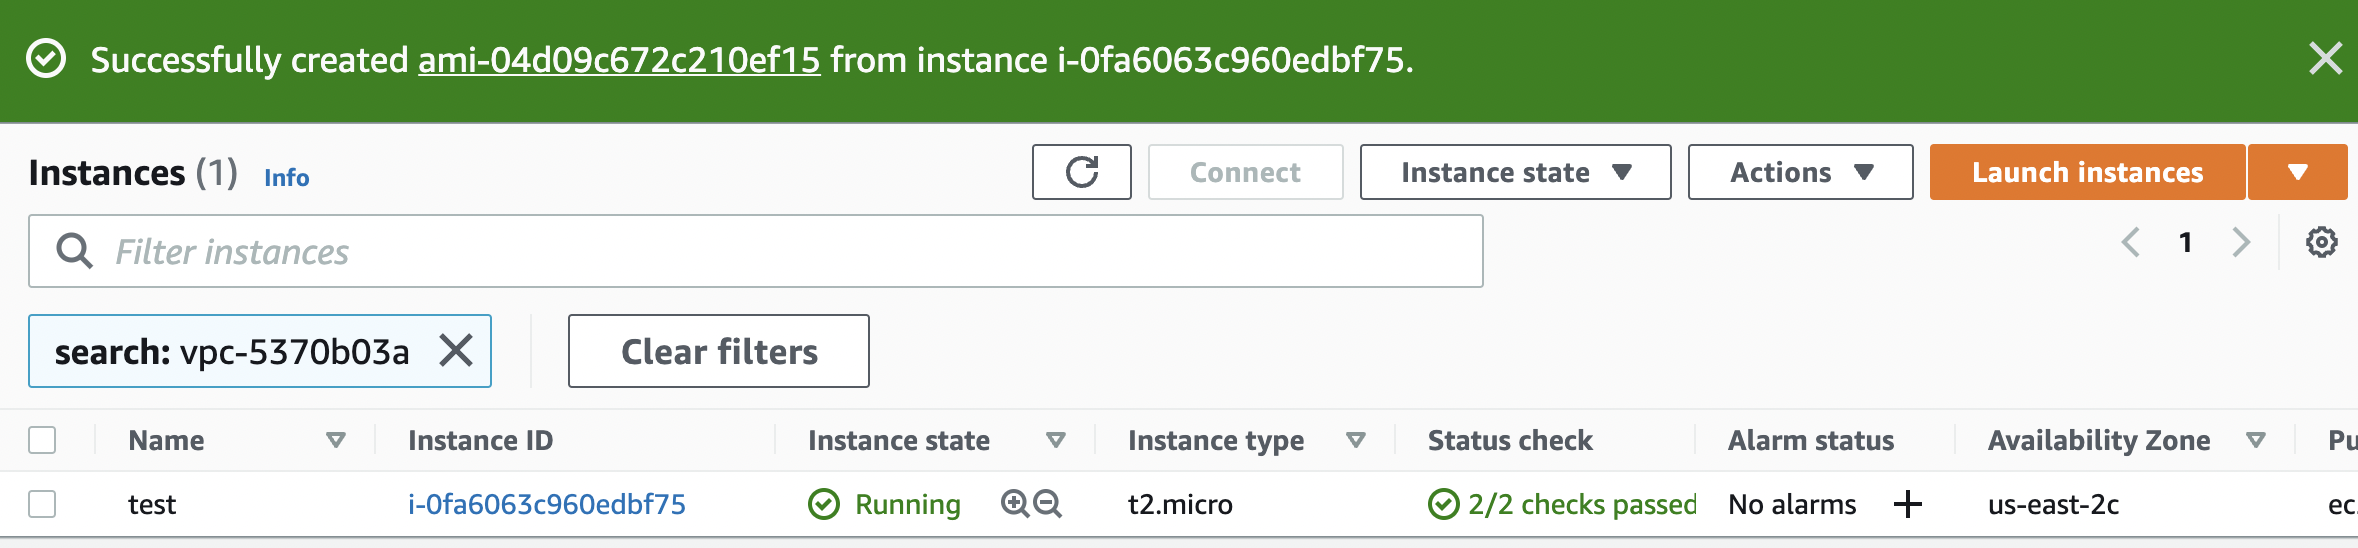
Once the “AMI” is created click on the “Launch Instance” button at the top panel to create a new “Instance”.
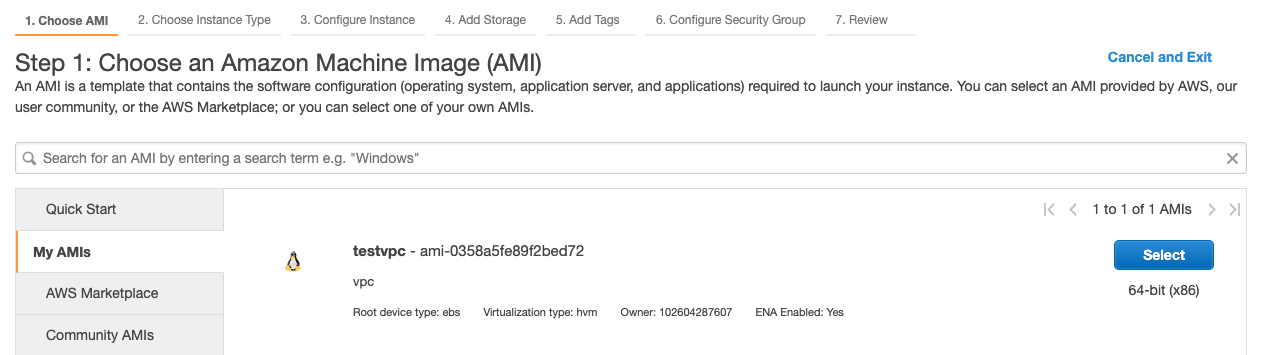
Click on the “My AMIs” option and choose the “AMI”.
Provide the other necessary details for the new “EC2-Instance”, then click the “Configure Instance Details” and choose the newly created “VPC” instead of default VPC.

Click on the “Review and Launch” button once reviewing the necessary configuration to launch the new “EC2-Instance”. Once the new “EC2-Instance” is in healthy state remove the older “EC2-Instance” which is using the default VPC.