VPC Elastic IP Limit
Determine if the number of allocated VPC EIPs is close to the AWS per-account limit
AWS limits accounts to certain numbers of resources. Exceeding those limits could prevent resources from launching.
Recommended Actions
Follow the appropriate remediation steps below to resolve the issue.
Log in to the AWS Management Console.
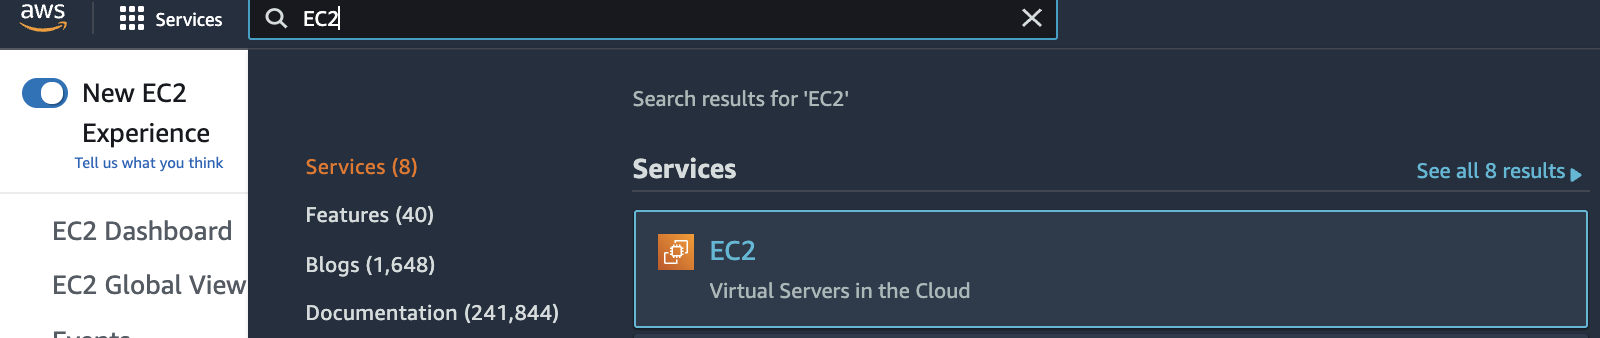
Select the “Services” option and search for EC2.
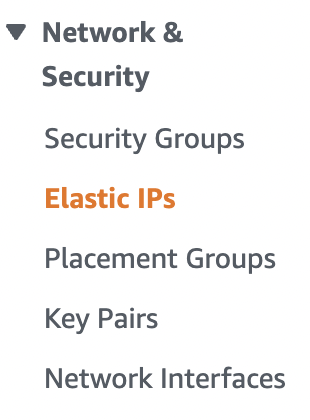
Scroll down the left navigation panel and choose “Elastic IPs” under “Network & Security”.
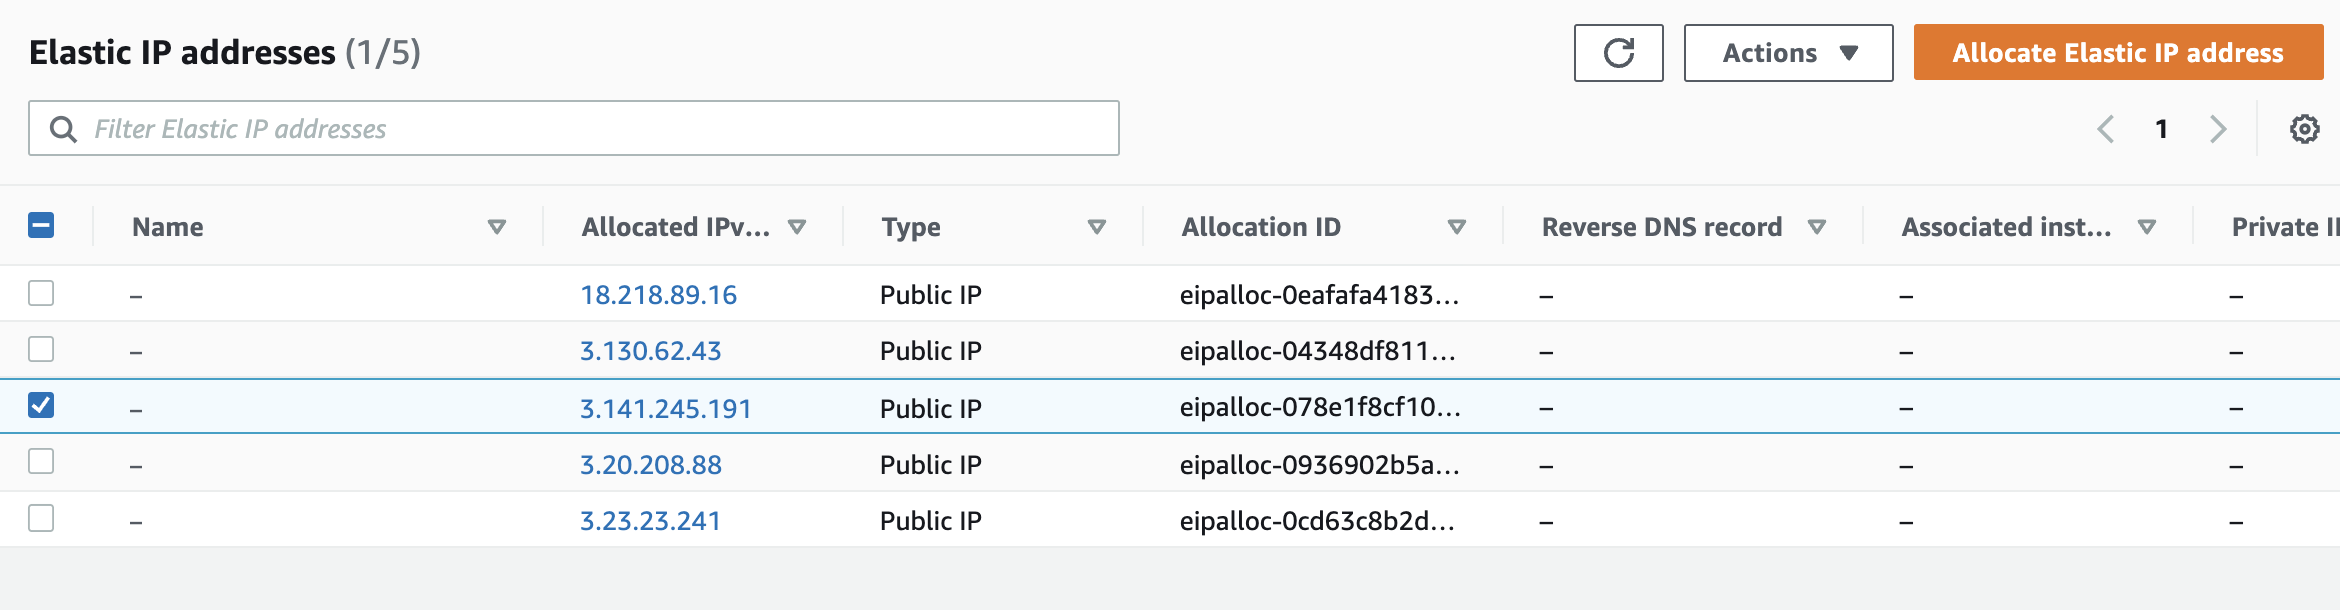
Check the number of “Elastic IPs” associated within the region. If the selected region has already reached the default limit of 5 Elastic IPs then raise an AWS support ticket to increase the number of “Elastic IPs” in the desired region.
Repeat steps number 2 - 4 to verify number of “Elastic IPs” associated with other AWS regions.
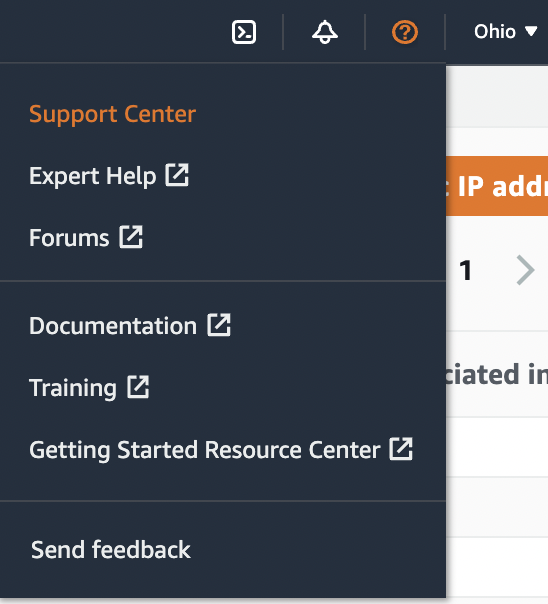
Click on the “Support Icon (?)” at the top right corner and select the “Support Center”.
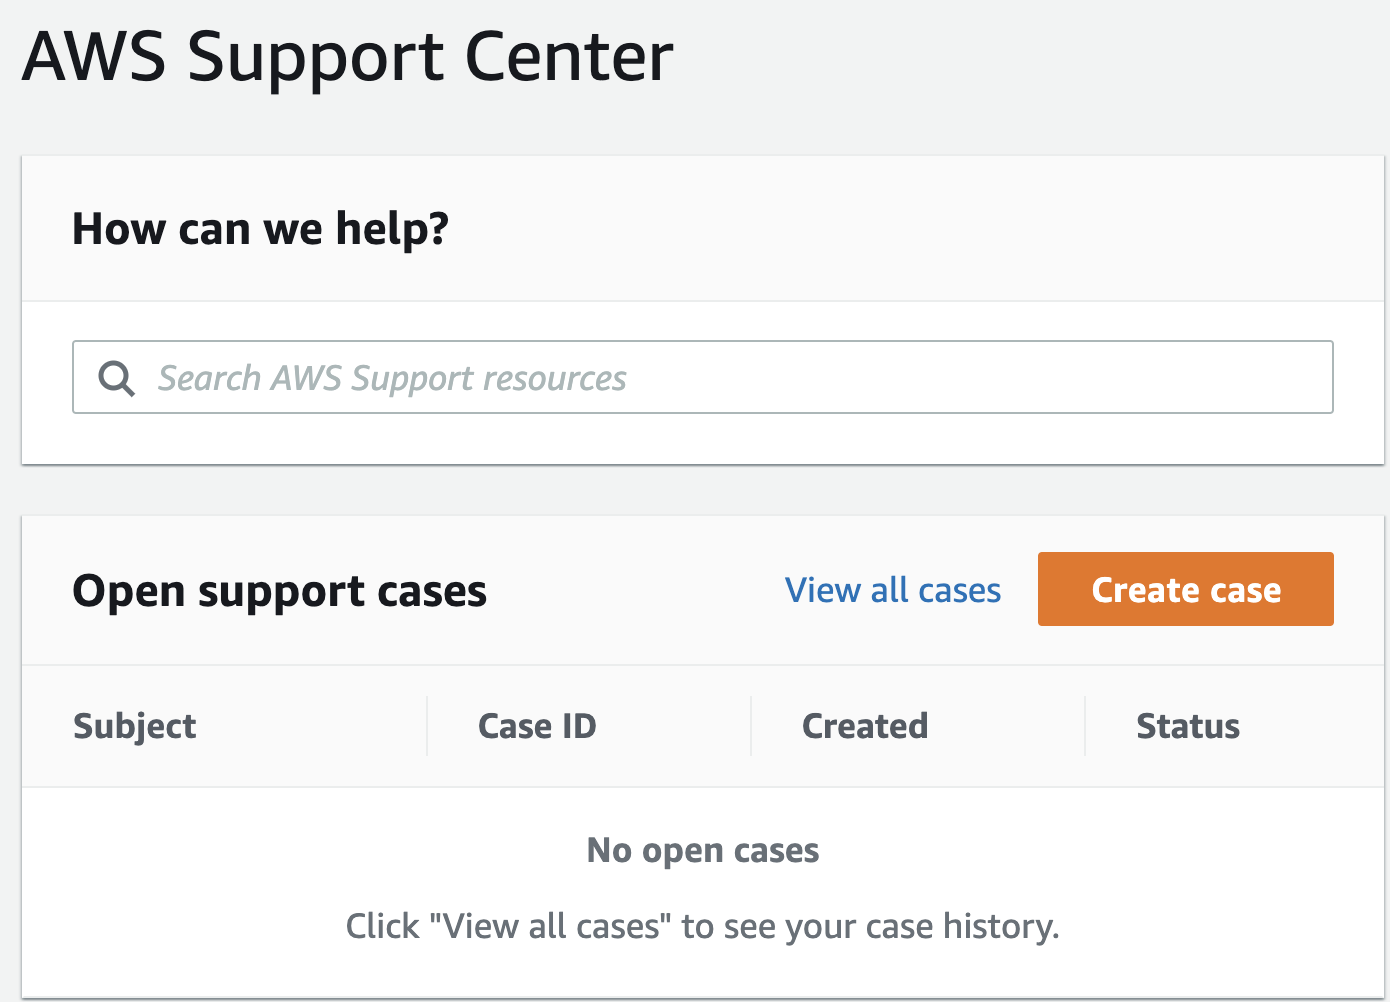
In the “Support Center” page click on the “Create Case” button.
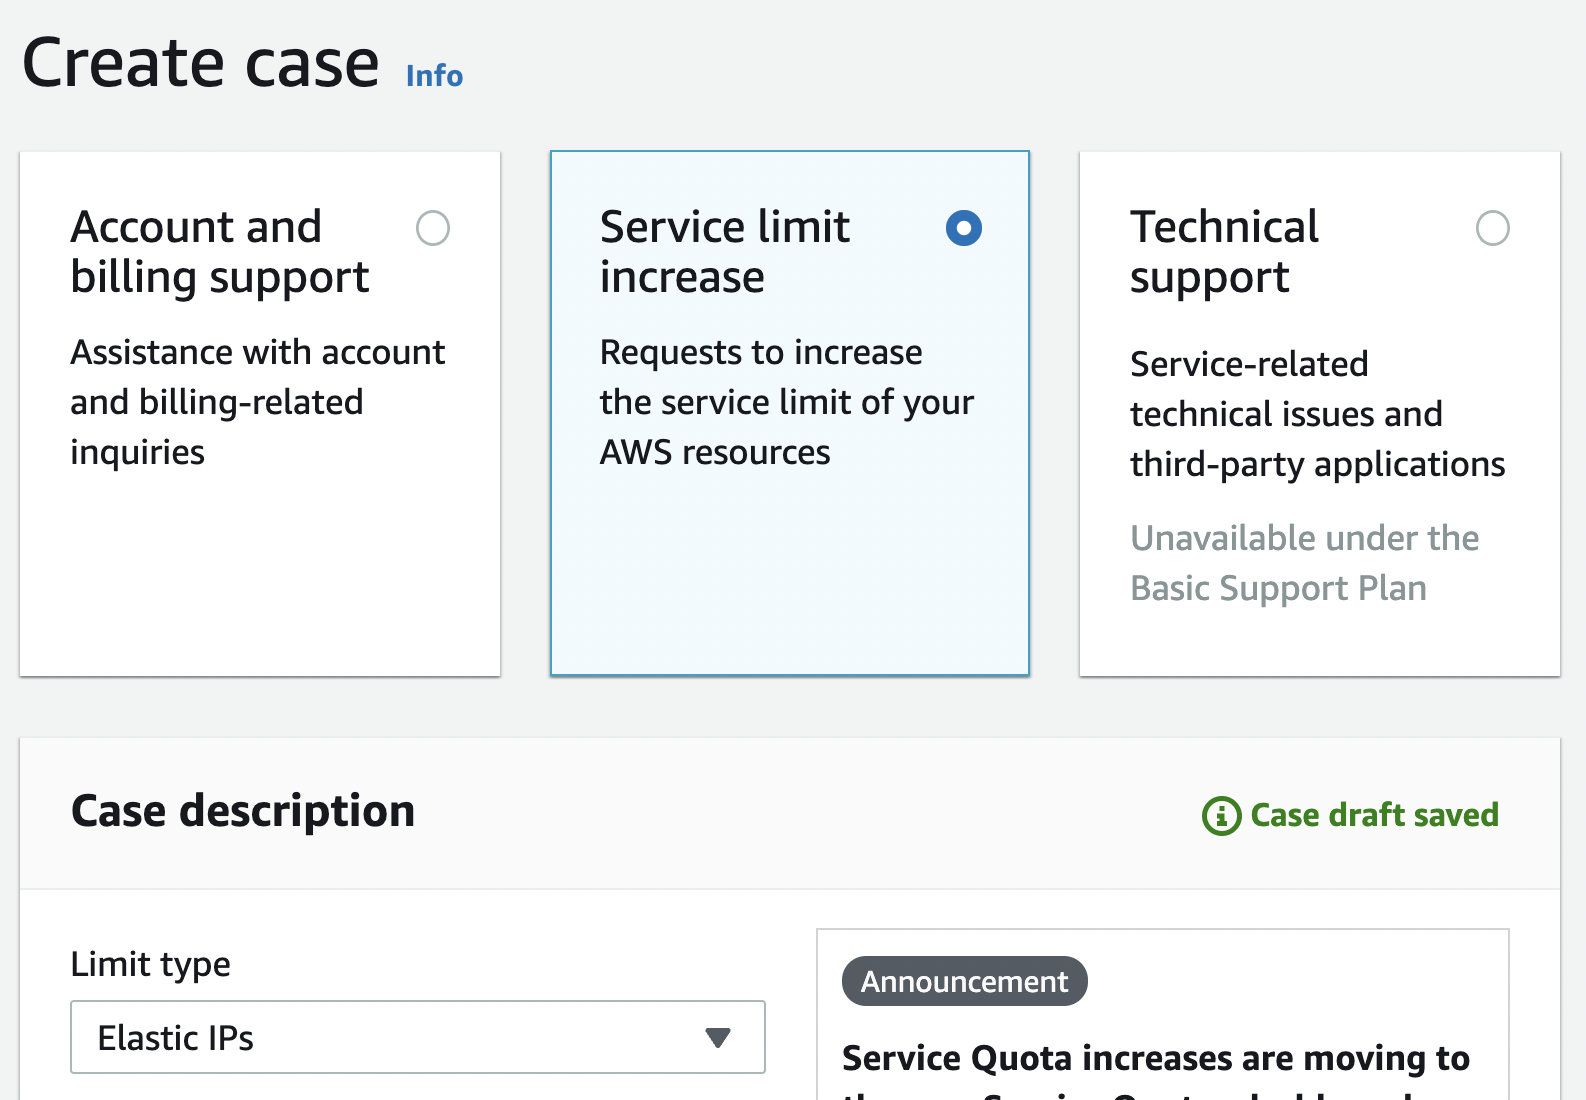
Select the “Service limit increase” tab and choose the “Elastic IPs” from the dropdown in “Limit Type”.
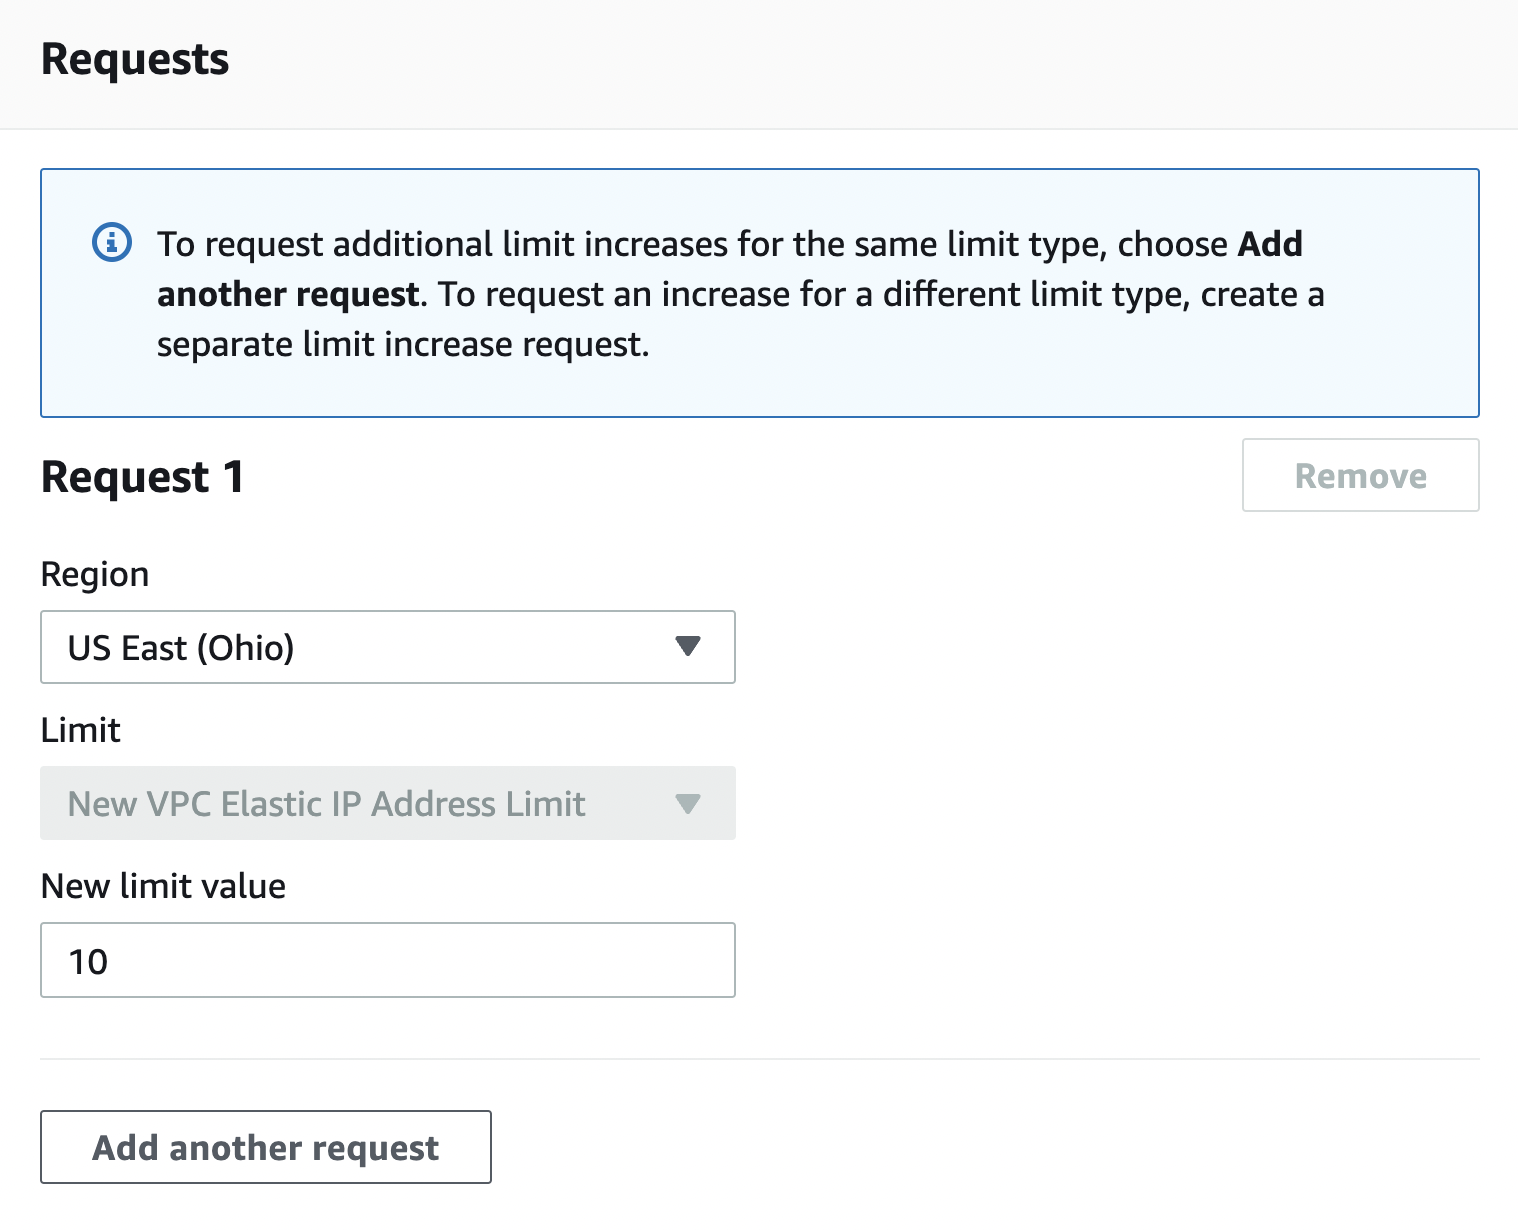
Scroll down the page and select the “Region” and “Limit” as either “EC2-Classic IP Address Limit” or “New VPC IP Address Limit”. Provide the “New limit value” as per the requirements.
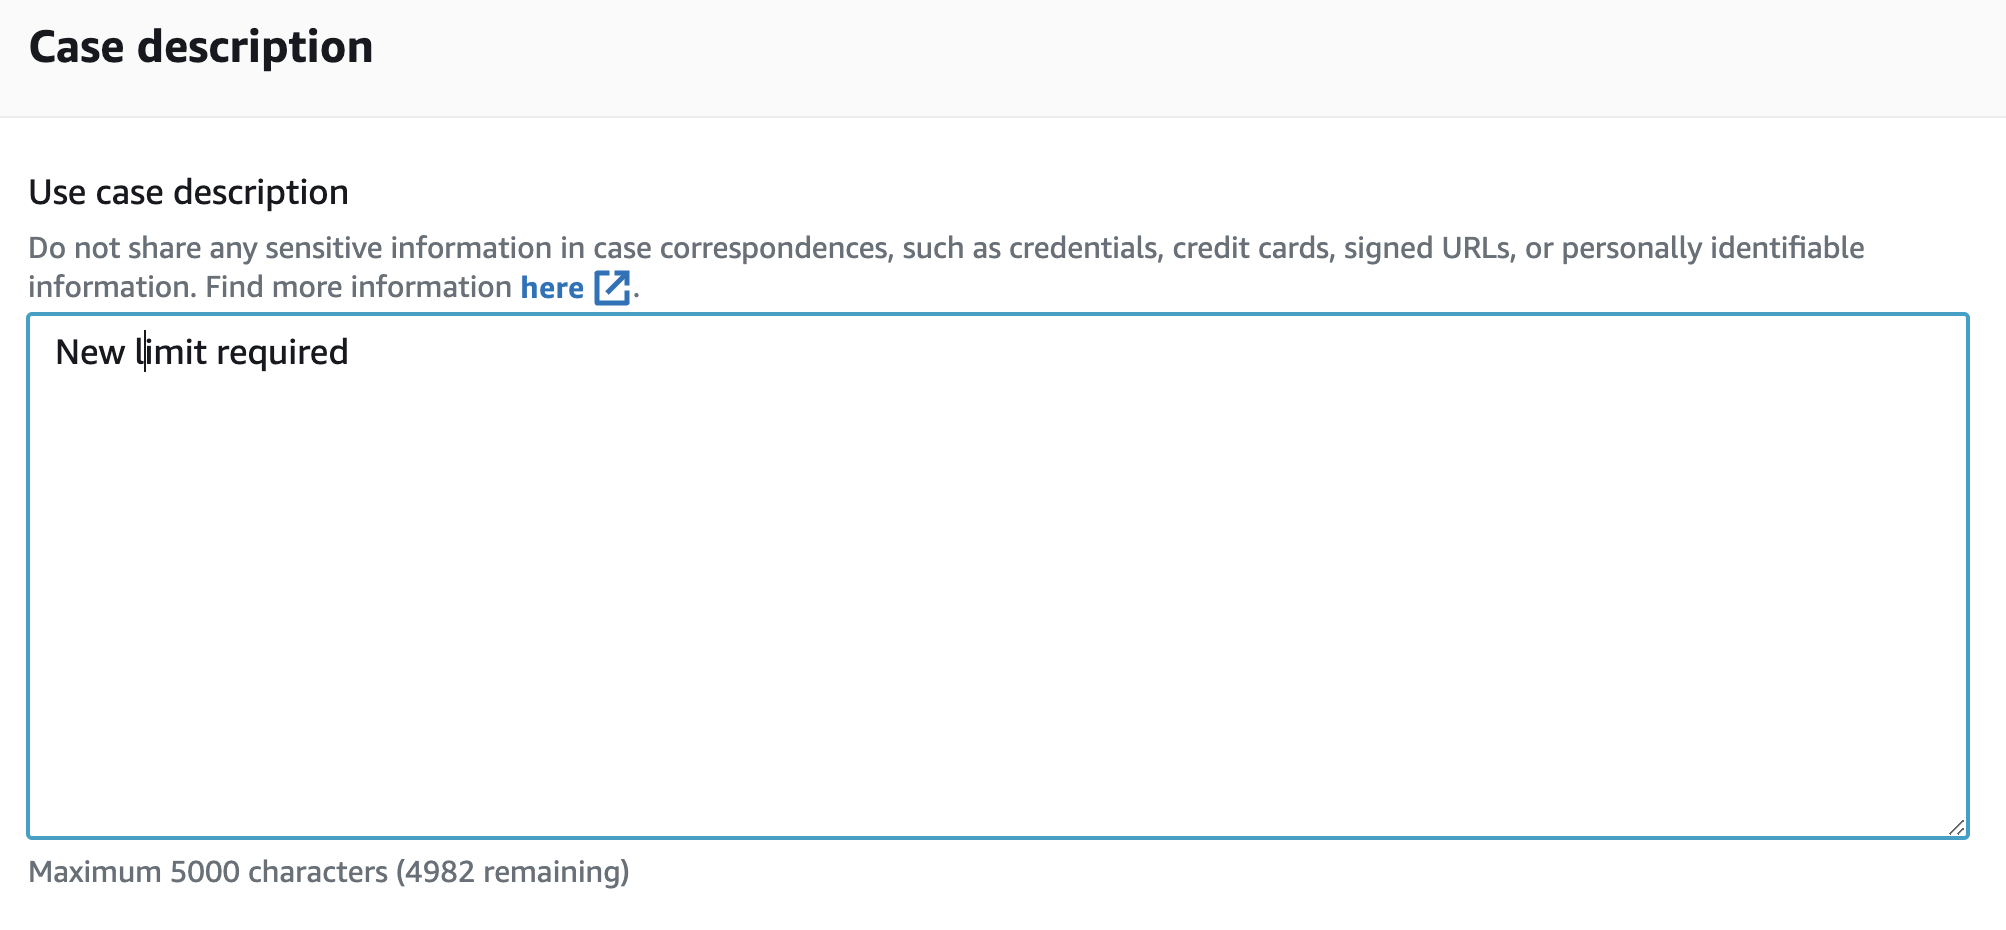
Provide a small description to your request in “Case description”.
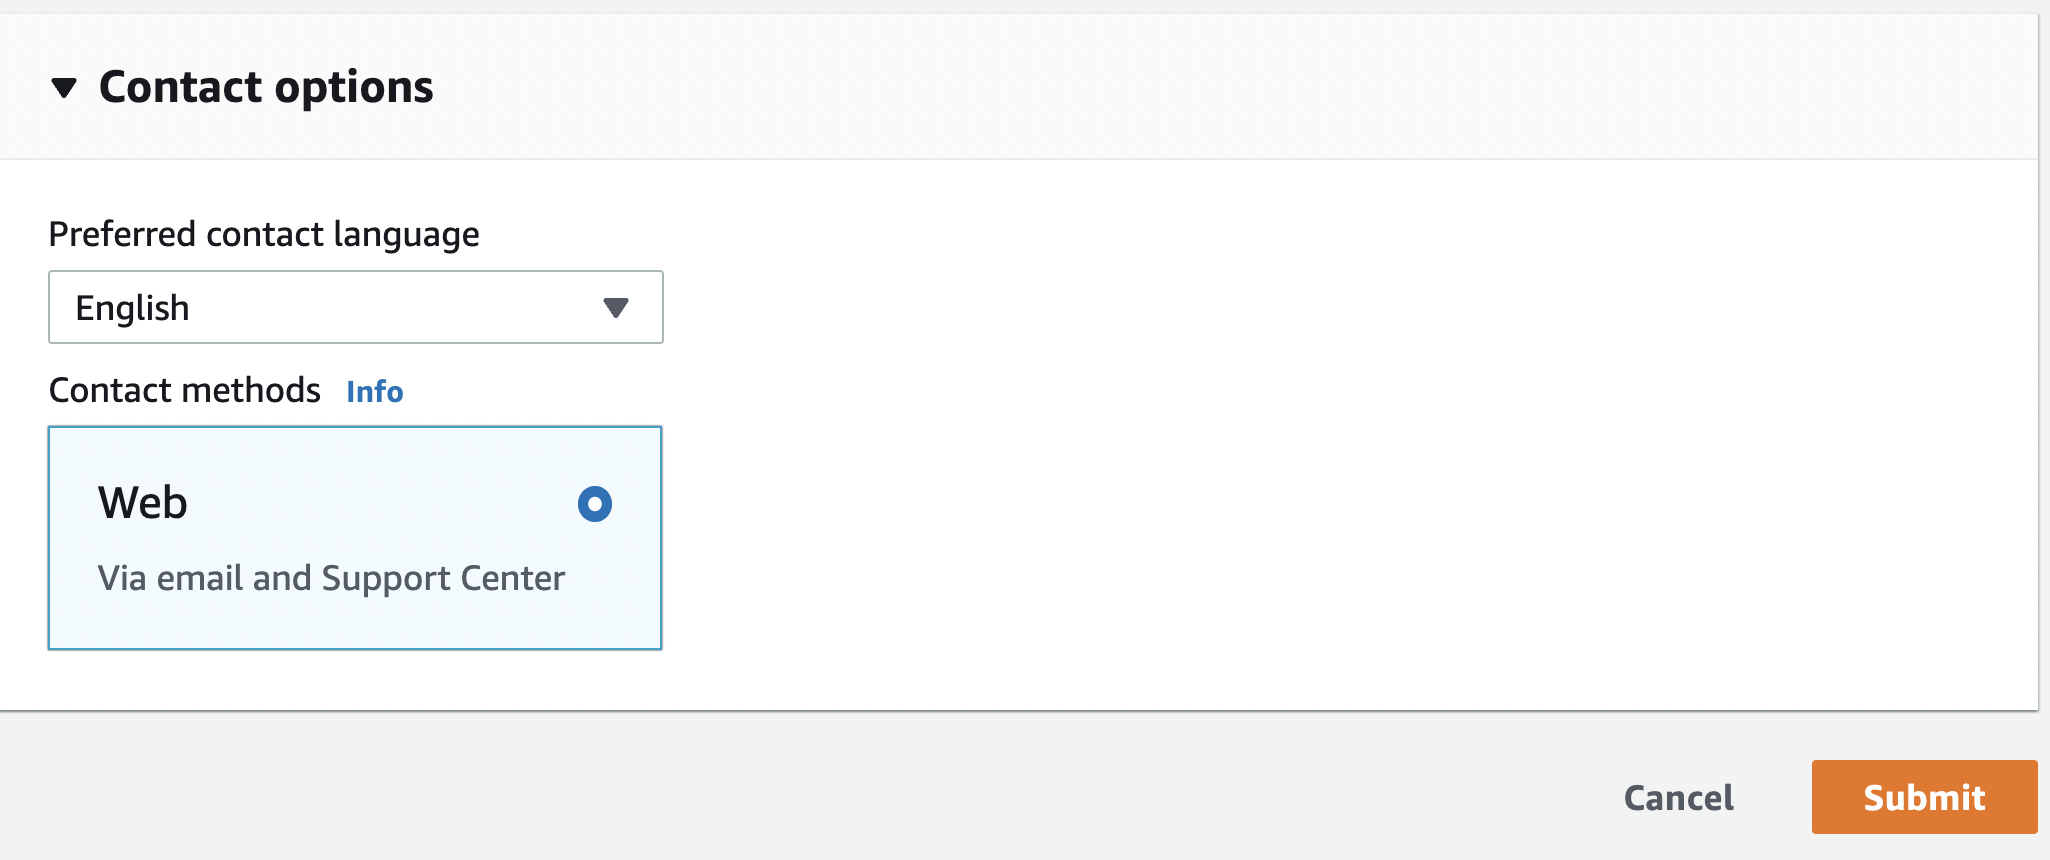
Select preferred contact option to the AWS Support team and click on the “Submit” button to increase the “Elastic IPs” request to AWS.