VM Auto Update Enabled
Ensures that VM Auto Update is enabled for virtual machines
Enabling Auto Update on Azure virtual machines reduces the security risk of missing security patches.
Recommended Actions
Follow the appropriate remediation steps below to resolve the issue.
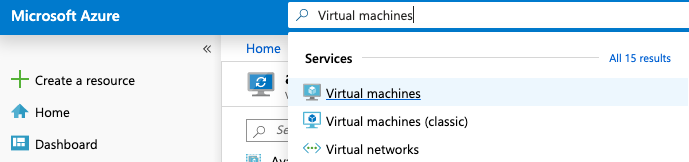
Log into the Microsoft Azure Management Console.
Select the “Search resources, services, and docs” option at the top and search for Virtual Machines.
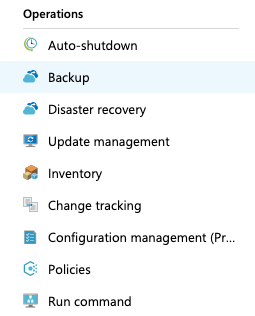
Select the “Virtual machine” by clicking the “Name” as a link to get into the configuration chanegs.

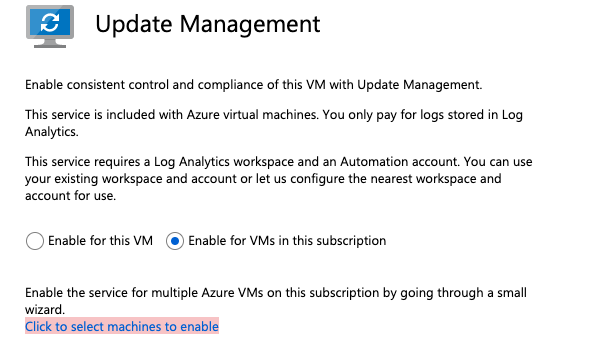
Scroll down the “Virtual machine” navigation panel and choose “Update management” under the “Operations” tab.
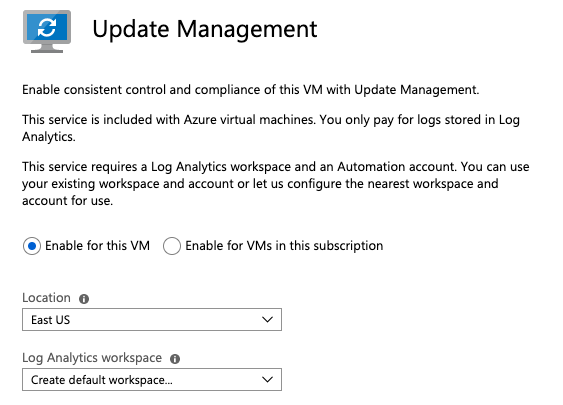
On the “Update management” page scrolls down and check whether the “VM Auto Update” is enabled for single Virtual machine or all Virtual Machines. If “VM Auto Update” is enabled for single VM then it will increase security risk of missing security patches for remaining VMs.
Repeat steps number 2 - 5 to verify “VM Auto Update” for other Azure accounts.
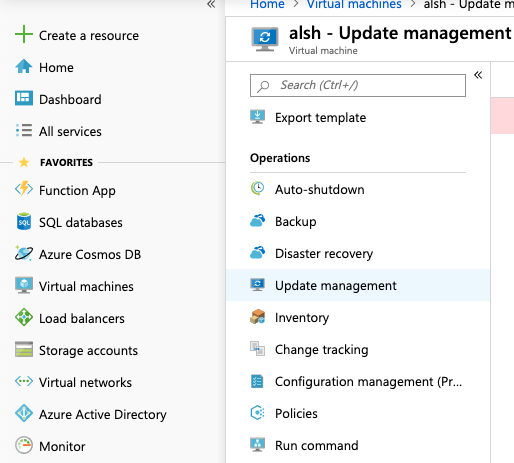
Navigate to “Virtual Machine”, select the “Virtaul Machine” by clicking on the “Name” as a link and select the “Update management” under the “Operations” tab.
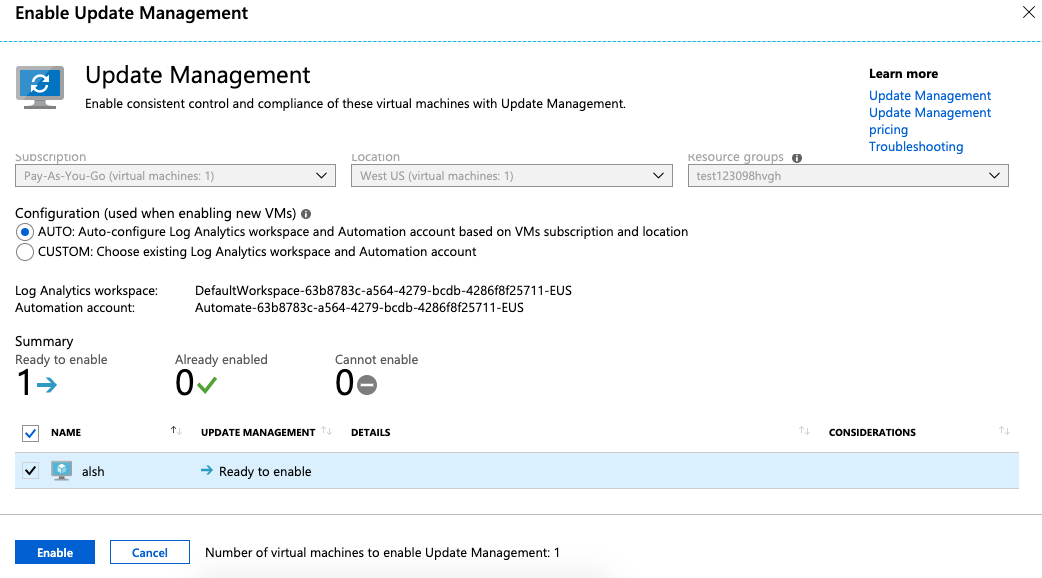
On the “Update Management” page select the “Enable for VMs in this subscription” and click on the “Click to select machines to enable” to choose the VMs in the subscription.
Once the VMs are selected click on the “Enable” button at the bottom of the page to “Enable Update Management”.
Repeat steps number 6 - 8 to enable VMs auto update on all virtual machines.